All students are required to complete the following badge before working in the Intaglio Workshops.
An in class induction is scheduled during class in Week 1. Please read the Safe Work Procedures before attending. If you miss the first class, you will be required to book a catch up induction outside of class.
Etching is a process within the intaglio printmaking family. Intaglio refers to techniques that manipulate the surface of the matrix (plate) to create grooves and indentations for ink to sit within. Pressure is applied so that the printing substrate (usually paper) pulls the ink out of the plate.
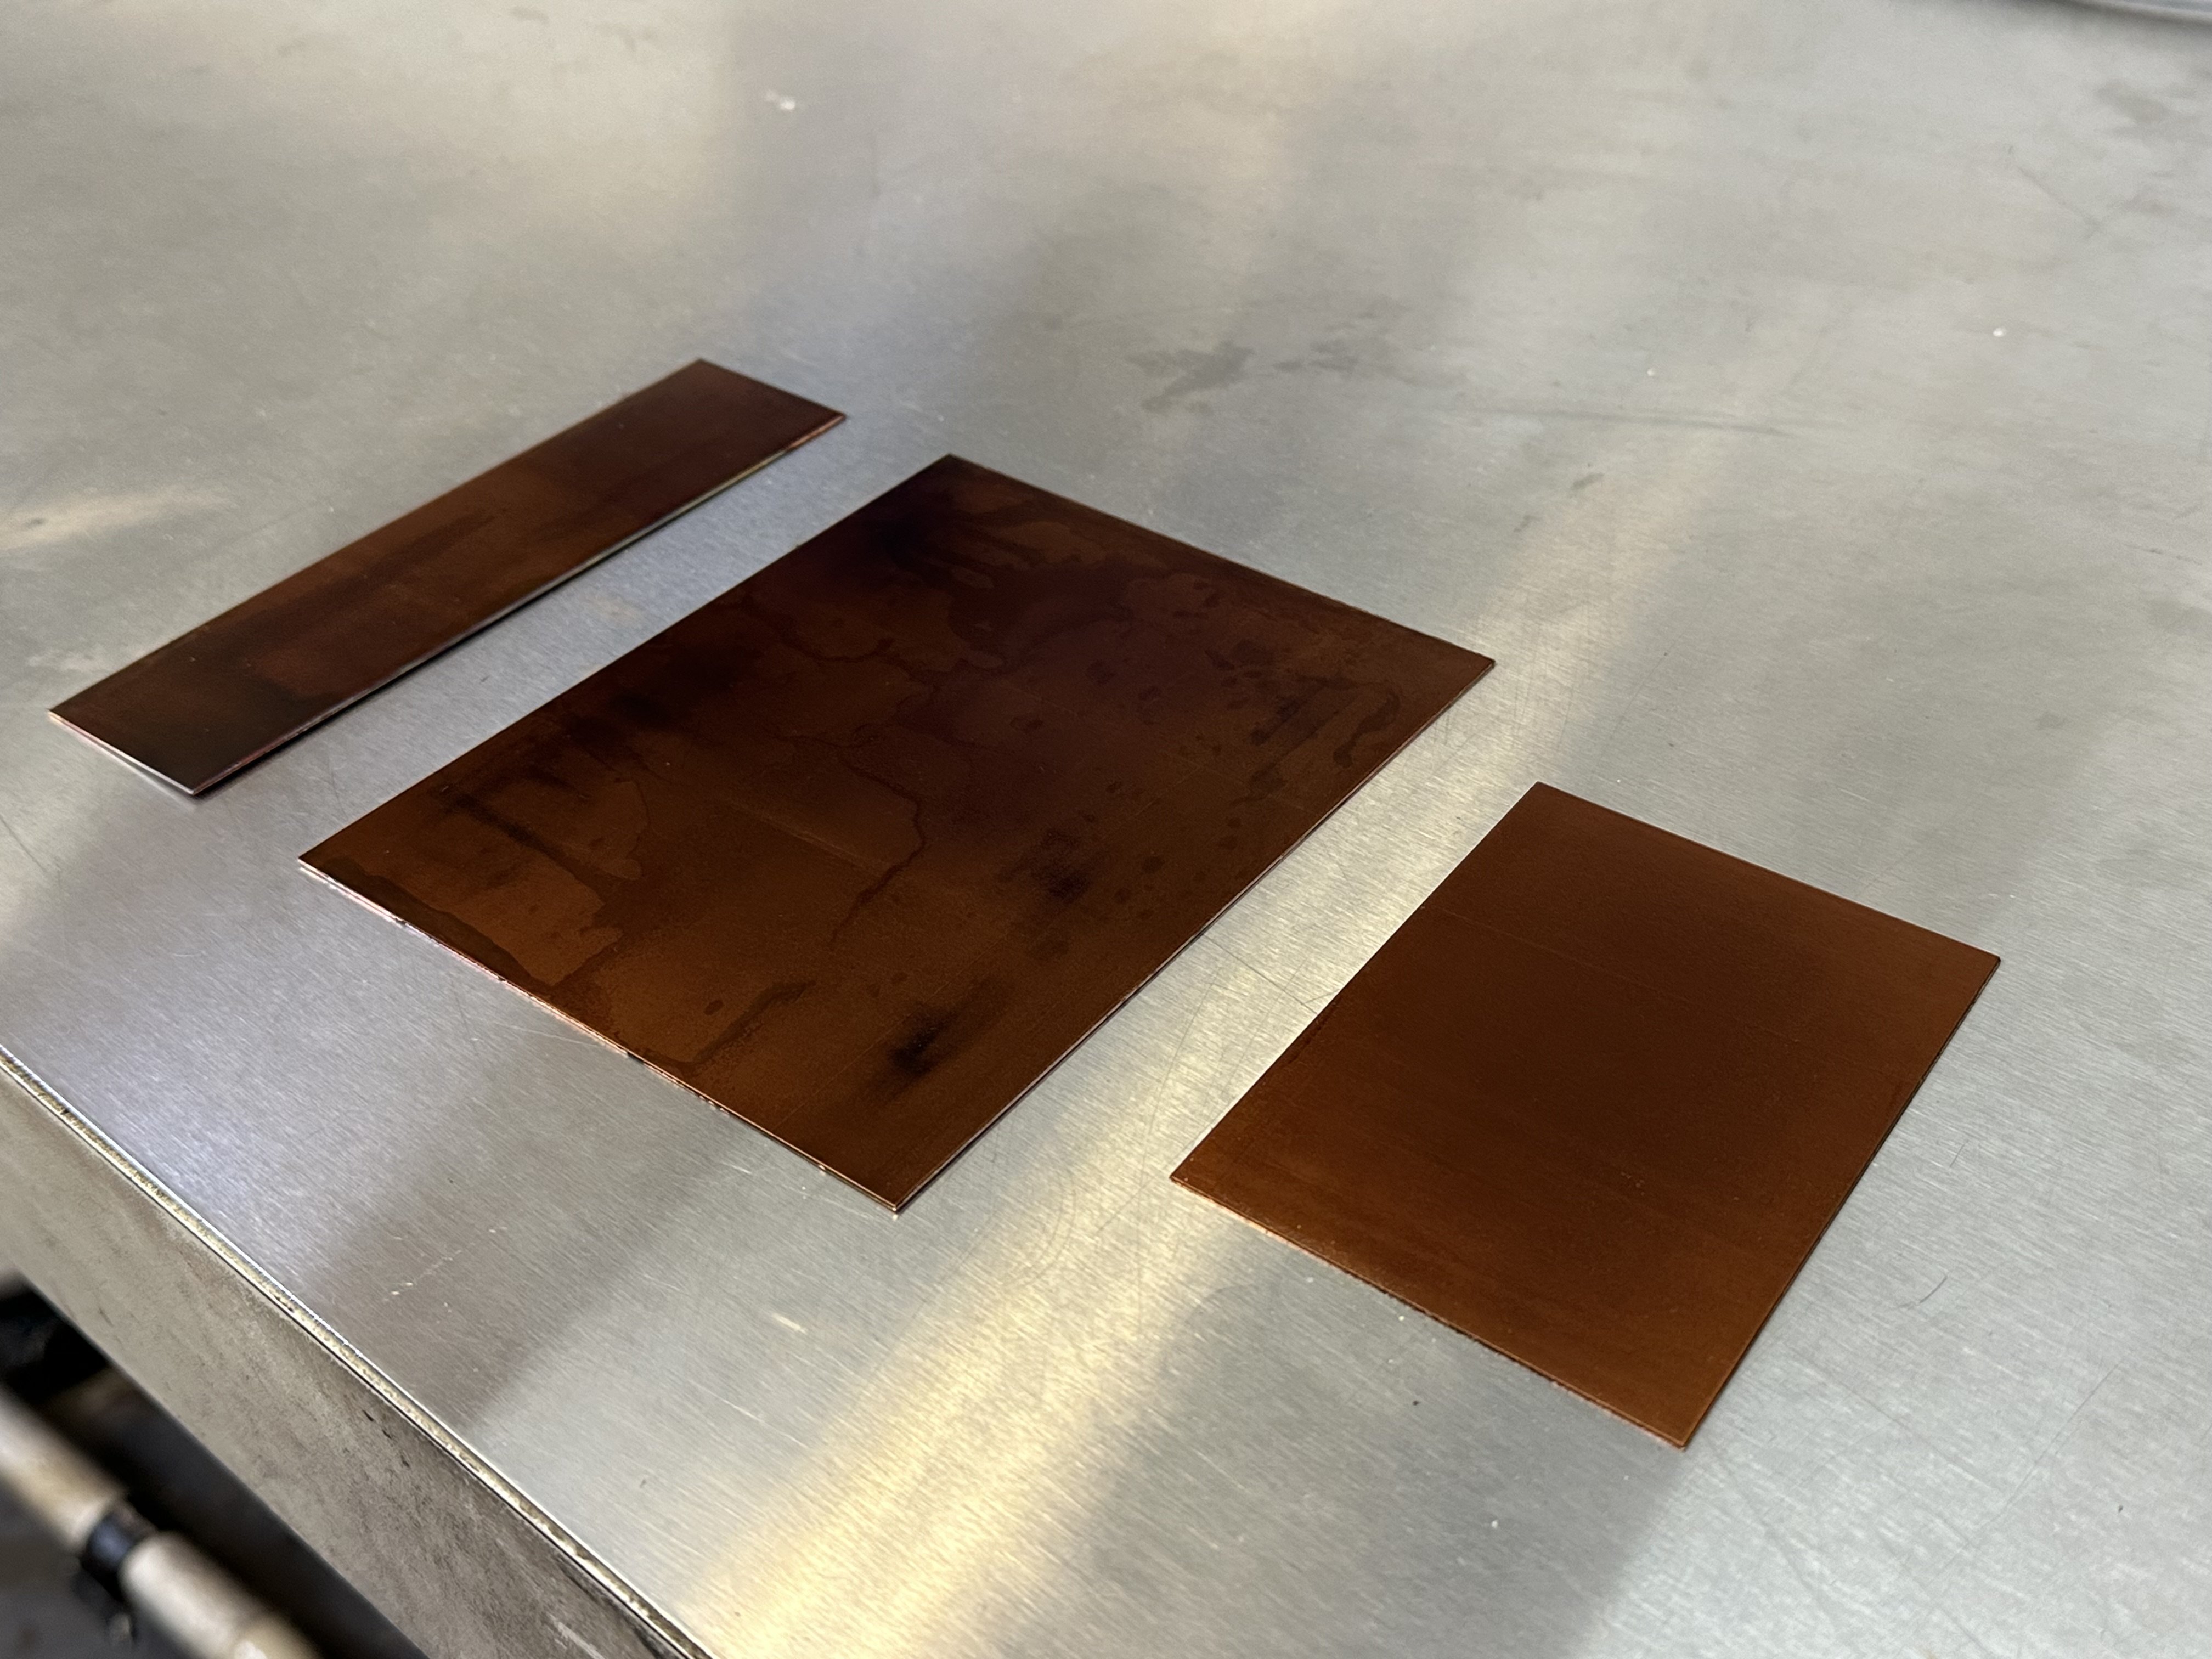
There are chemical-free techniques of etching, such as paper plates and copper drypoint. The Printmaking: Etching course focuses on acid etching into copper using Edinburgh Etch (ferric chloride and citric acid).

If you are concerned about the condition of the plate, it can be polished before etching.
Before applying any ground or rosin to a plate, the surface needs to be thoroughly degreased to achieve an even and well-adhered application.
2. Activate the calcium carbonate with either:
3. Use a brush or rag to create a paste and work the mixture around the surface of the plate.
4. Rinse with warm water.
5. Repeat until satisfied. Leave to dry on the drying rack. Try not to touch the surface of the plate with your fingers.
Hard ground is ideal for line work, usually created using a scribe.
1. Warm the plate on the hot plate. Placing the plate on a piece of newspaper can help to manoeuvre the plate.
2. Once warm, melt a spot of the ground ball on the plate and spread evenly using a roller.
3. More ground can be added as needed. A good application of ground should be the colour of strong tea rather than coffee.
4. A scribe is traditionally used to create marks by removing the ground to expose metal.
Soft ground is more tacky than hard ground. It is used to create texture.
Soft ground is applied to the plate following the same steps as above. Soft ground will behave slightly differently to hard ground due to its stickiness. It is also a different colour but requires the same density of application.
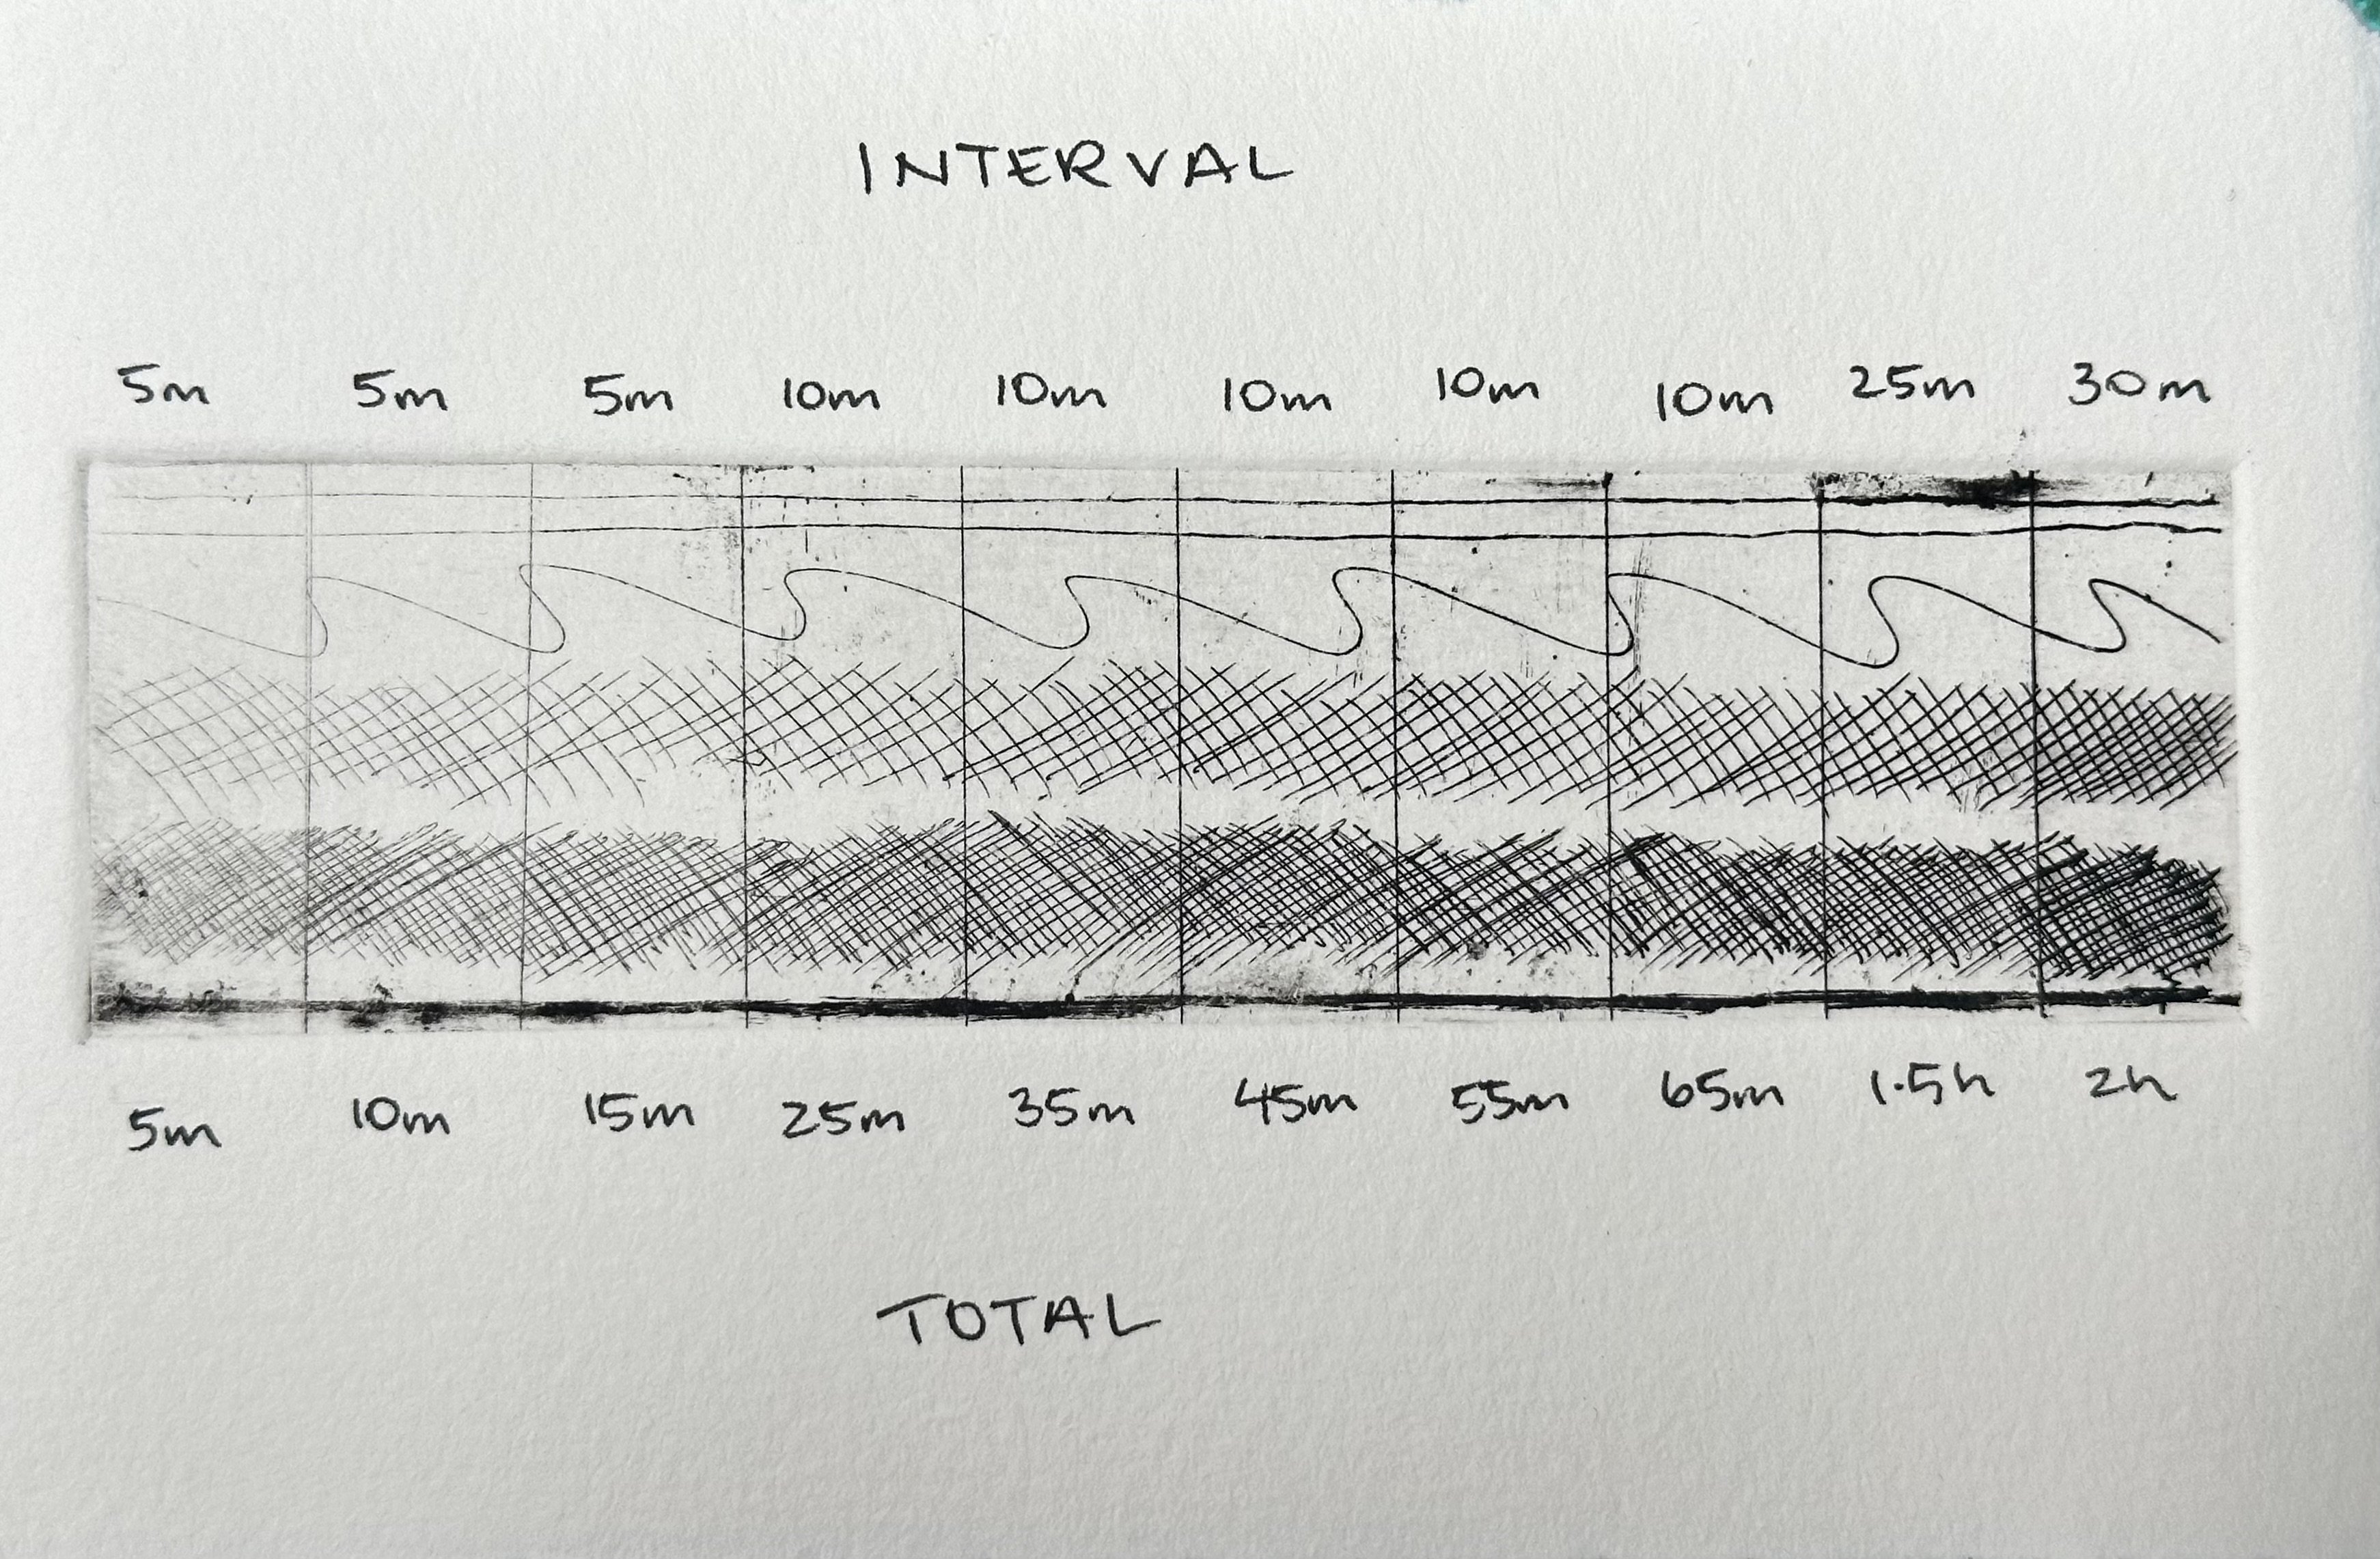
Texture is created by applying pressure to remove the ground to expose metal. This can be achieved by:
Prepare your plate for acid biting:
Biting in acid:
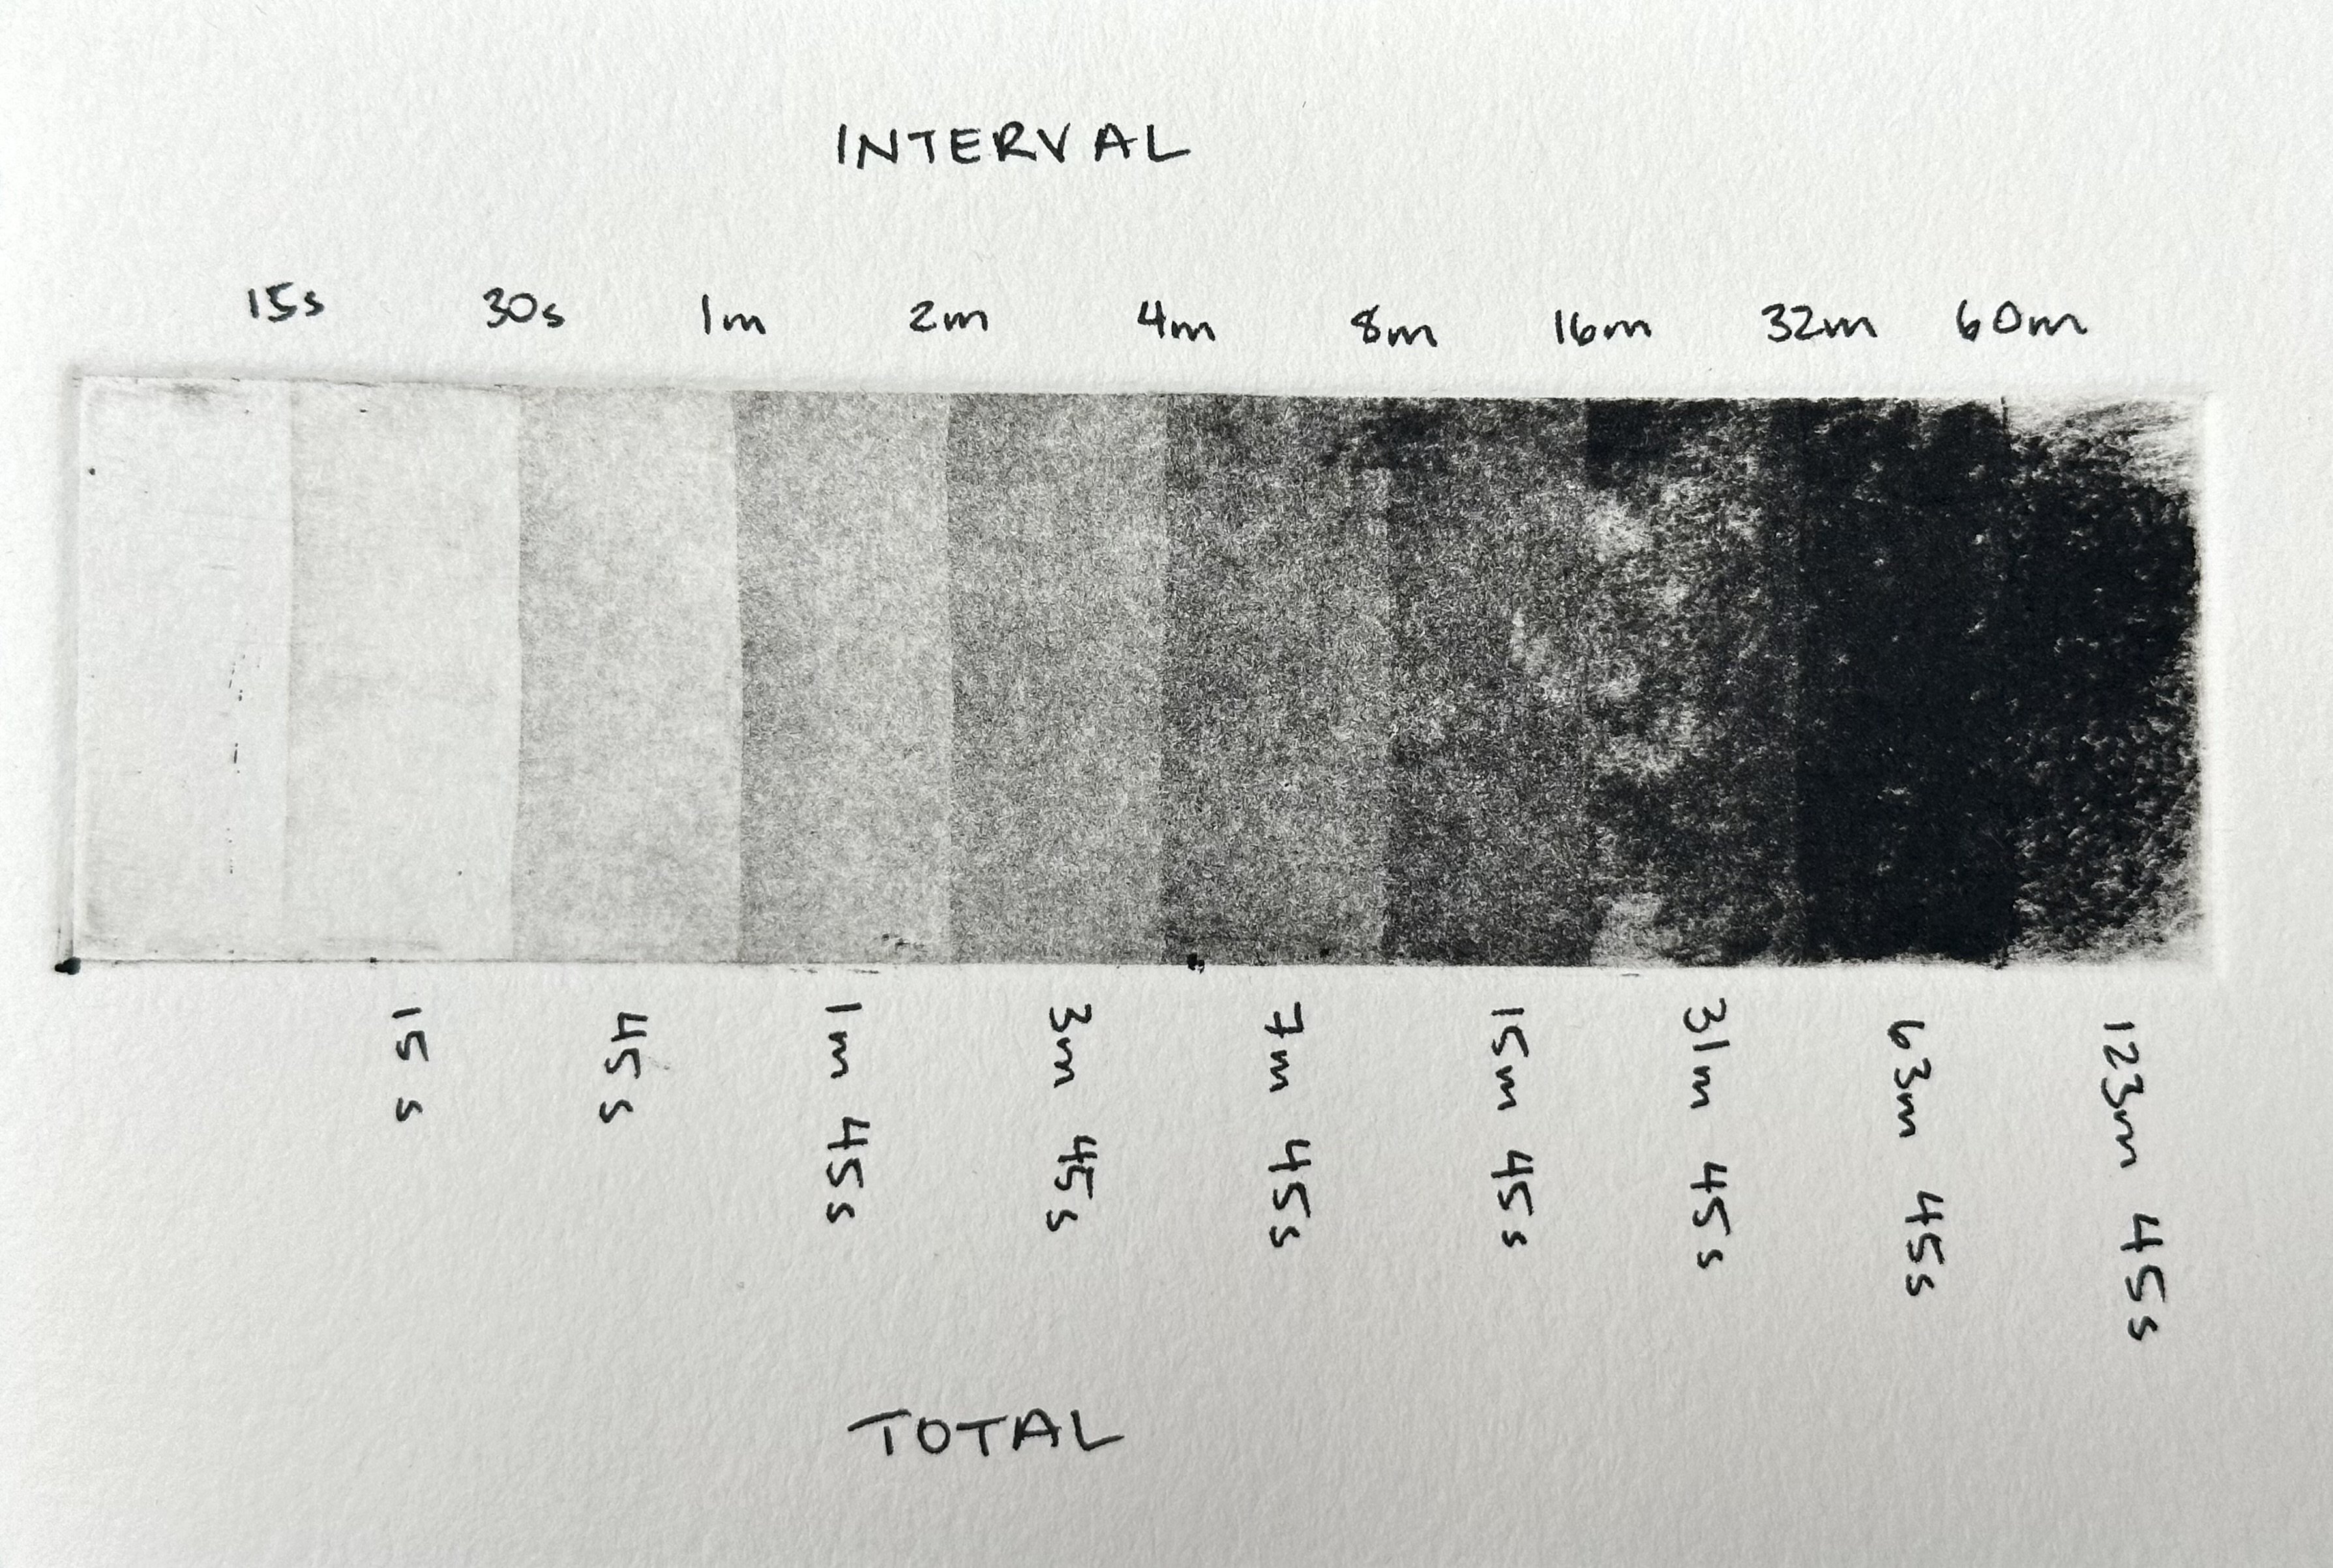
Bite time is determined by the desired depth of line or tone. The longer the bite, the deeper and darker the line.
Guide:
| Thin line | 35 mins | |
|---|---|---|
| Standard line | 45 – 55 mins | |
| Deep line | 1.5 - 2 hours |
1. Degrease and dry the plate.
2. Agitate the powdered rosin inside the cabinet by strongly cranking the handle 15 times. Leave the rosin to settle for 15-30 seconds to allow larger particles to drop.
3. Place the plate degreased side facing upward into the cabinet, close the door and leave for 10 minutes to achieve an even coating.
4. Carefully transfer the plate from the cabinet to the metal grill.
5. Melt the rosin using a heat gun. Turn the heat on, then bring up towards the underside of the plate. Melt from the centre and move outwards.
6. Allow the plate to cool before touching or working further.
Additional acid resists can be applied to the plate to create different marks, textures and tones. Working white/light to dark, cover areas of the plate between biting times.
Some acid resists include:
Remove all grounds, acid resists and rosin before printing.
| Chemical | Removes | |
|---|---|---|
| Mineral turpentine |
Hard and soft ground Bitumen Crayon, oil pastel, lumocolor pencil |
|
| Methylated spirits | Rosin/aquatint | |
| Acetone | Heat press transfer |
The edges of the plate must be filed or bevelled before printing to prevent ripping your paper or the press blankets. Use a file at a 45-degree angle to round off the plate edges, then polish out the file marks with sandpaper.
Measure and tear down your paper. Use a heavy metal ruler to tear or cut (with a blade) a straight edge. Don’t use scissors.
Mark each sheet with your initials using a graphite pencil.
Pre-soak the paper in a water bath for about 30 minutes before printing.
To ensure that your image is repeatedly printed straight and/or exactly where you want it on your paper, you need to create a guide or registration sheet.
Technical staff will set up the press for printing.
1. Pre-warm the plate on a hotplate. This will make it easier to work the ink into the surface of the plate.
2. Select your colour, mix if needed.
3. Use a piece of cut cardboard spread around and into the plate.
4. Buff down the plate with a piece of softened muslin. This will push the ink into the plate textures and remove any excess from polished areas.
5. Use phonebook paper to polish the surface of the plate. Keep the paper flat and use the butt of your hand. Try not to scrunch the paper.
6. Clean the edges and back of the plate, if needed/possible, with a rag.
It can help to work in pairs while printing, a ‘dirty hands’ person to ink and a ‘clean hands’ to handle the press blankets and paper.
4. Press blankets, either:
5. Run the press through. Make sure the blankets stay flat and don’t crease or fold going through the press.
6. With clean hands, lift or throw back the press blankets.
7. Reveal the print and place on the drying racks. Remove the plate and wipe down the press bed.
8. Re-ink the plate and repeat for further prints.
Wipe down the press bed after every print and at the end of the printing session. A dry rag should be enough between prints.
For stubborn ink, use eucalyptus oil. Do not use VCA or vegetable oil.
Use mineral turpentine to clean ink from the plate. Leaving ink to dry in the plate can degrade the plate, particularly aquatint.
Prints can be left on the drying rack to ‘cure’. Oil-based inks can take a few days to dry completely.
The racks will be cleared regularly. Check the drawers in the workshop for Unracked Prints, either the general drawer or your labelled class drawer.
The damp paper will warp as it dries. To flatten the prints again:
1. Re-wet the prints in a water bath. The ink is oil-based so won’t run in the water.
2. Blot with a towel so the paper is damp to touch (same as when printing).
3. Place the prints on grey boards, making sure that they are not stacked or overlapped. The grey boards can be stacked.
4. Place the boards either:
5. Leave the prints under weight for at least a week and regularly swap around the boards as they soak up the water from the prints.