If you borrow a screen from a technician there may be an old image still on the mesh, or you may be ready to change images on your screen. You will need to remove this emulsion and degrease your screen before you can re-coat with emulsion and expose your new image onto the screen.
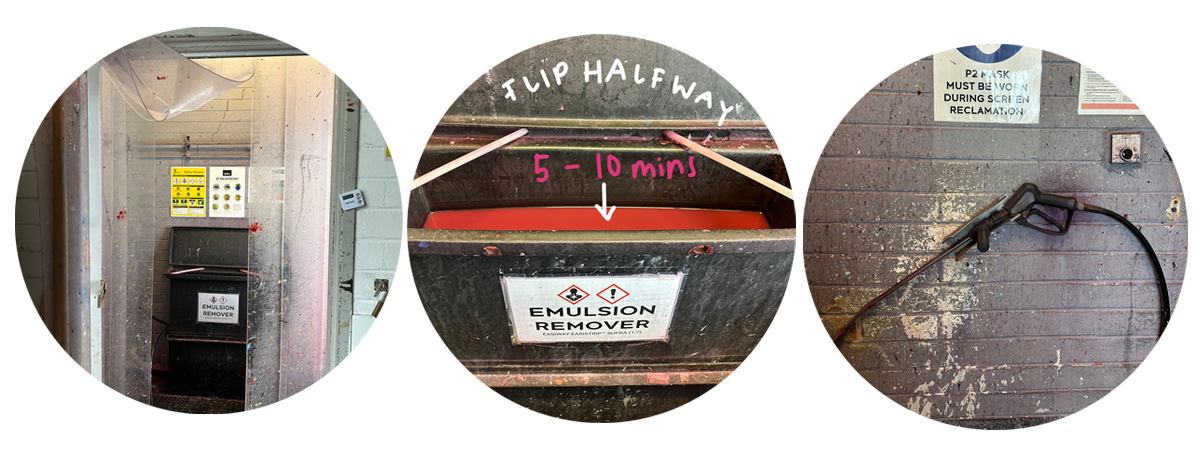
Put on green gloves and place your screen in the emulsion remover tank for around 10 minutes. You may need to flip your screen after 5 minutes to make sure the entire mesh has been submerged in the emulsion remover. The tank can fit 3 screens comfortably.
Put on an A2 mask, a visor with ear protectors, a yellow raincoat and green gloves before entering the screen reclamation room. Take your screen and place it in the trough with the frame side against the backlit area.
Make sure the power hose switch is on (it's on the wall).
Use the power hose to remove the emulsion. It should come away easily but for stubborn areas you can get close to the mesh with the nozzle of the hose – don't be afraid to get too close.
When the emulsion is all removed there may be a ghost image on the mesh. This is where ink has stained the mesh from a previous image and won’t affect your image. Hold it to the light and see if you can see through the stain. If so, it’s completely fine.
If you aren’t sure, show it to a technician for guidance.
The next step is the to make sure your mesh is very clean by using the degreasing agent and a white brush. You will find these in a tray beneath the wash-out sink.
Put on green gloves and place your screen in the wash-out sink.
Spray degreaser on the flat mesh side of your screen and scrub with the white brush provided. Scrub on both sides of your screen.
Spray off the degreaser with the hose and dry your screen either outside (screen side against the wall so water drains out of your screen and doesn’t collect in the frame), in the drying cabinet, or in front of the fans (if these aren’t already on, the switch is on the wall opposite the fans). Store it in the screen storage if you aren’t using it immediately. Please don’t leave campus without taking your screen inside.

Put on a pair of disposable gloves and either place your screen on the coating benches or in the wall-mounted coating rack.
Choose the correct length of coating trough (small for A3 screens, medium for A2 screens and large for A1 screens) and get 2 coating caps for your trough. Make sure that these are all completely dry before you use them. Cloths are provided below the benches.
Fill your coating trough with emulsion to about halfway. If there are any large bubbles, burst them with the corner of a hard white spatula. You can also tap your trough to bring any bubbles to the surface and burst them.
Place the trough at the bottom of your mesh (not frame) and tip until the emulsion is just touching the mesh.
Using a light but firm pressure, move the trough up the screen in one fluid motion.
Stop a couple of centimetres from the top, tip the trough away from the screen so the emulsion is no longer touching the screen, and move the trough up and away. This enables you to coat the whole area without having a thick area of emulsion at the top.
You’re looking for a thin, even coating. This is the hardest part to master, so if you aren’t sure, or aren’t confident please ask a technician for help. We would much rather help you to coat your screen than to clean up a big emulsion mess!
Scrape away any thicker areas along the sides of the coating and put them back into the emulsion tub.
Place your screen in the drying cabinet for about 15-20 minutes, or until it’s completely dry. The emulsion is light-sensitive so leave it in the drying cabinet until you expose it. As there is limited space in the drying cabinet, please don’t coat your screen too far in advance of when it will be exposed.
Remove one end of the trough, and using a soft spatula, scrape all the unused emulsion back into the tub. Place the lid back on.
Clean everything that you use in the large cleaning sink, dry, and replace.
While your screen is drying you can work on your positives.

The exposure unit uses LED UV light which cures the photosensitive emulsion. Where your black opaque image on film (positive) blocks the light from reaching the emulsion, it will wash out of the mesh after exposure and create your stencil to print through.
To EXPOSE your screen
