A jewellery saw is used to cut simple and complex shapes in metal and other materials. With practice, beautiful designs can be created using this handheld tool. The jewellers saw will become a vital tool for your jewellery making practice over time.
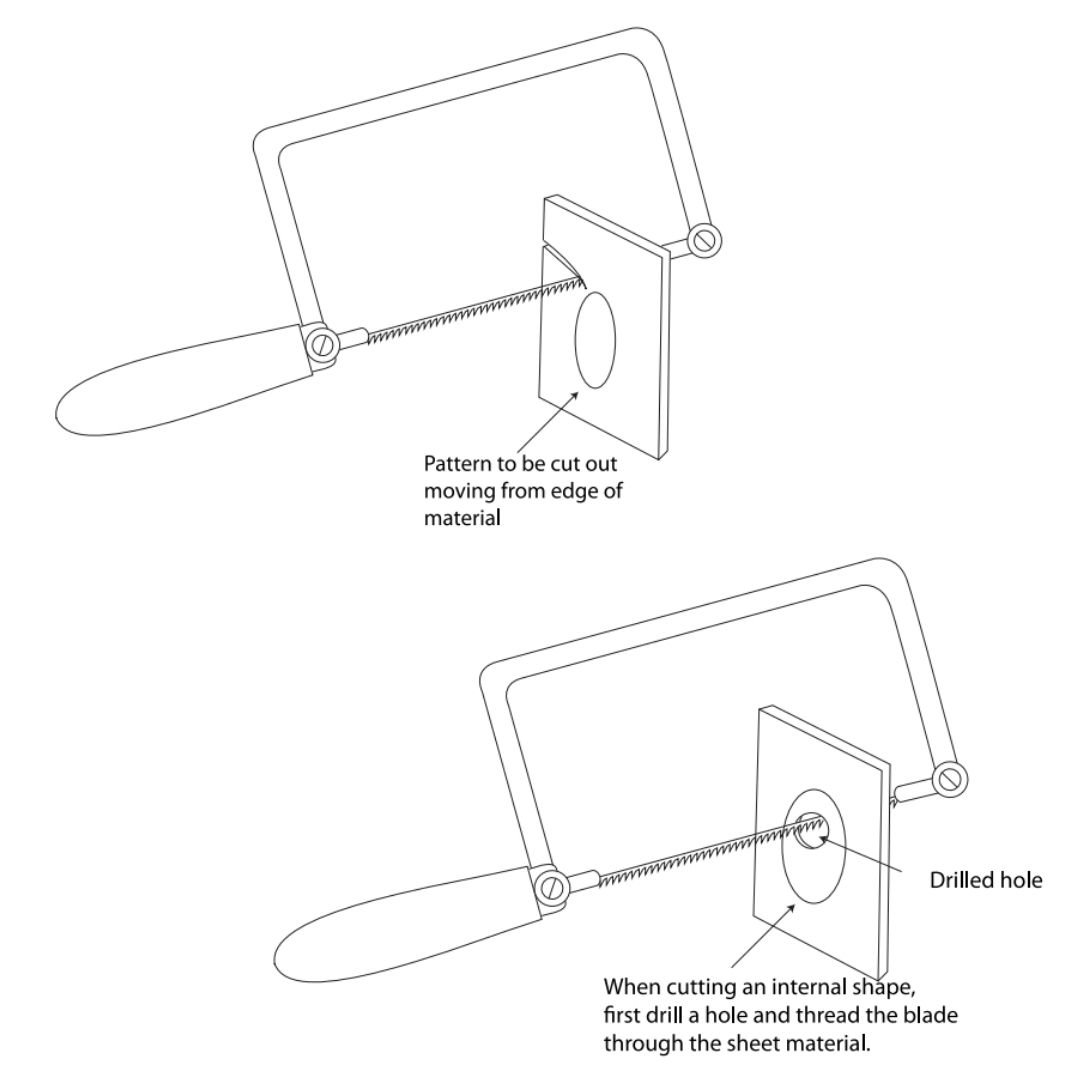
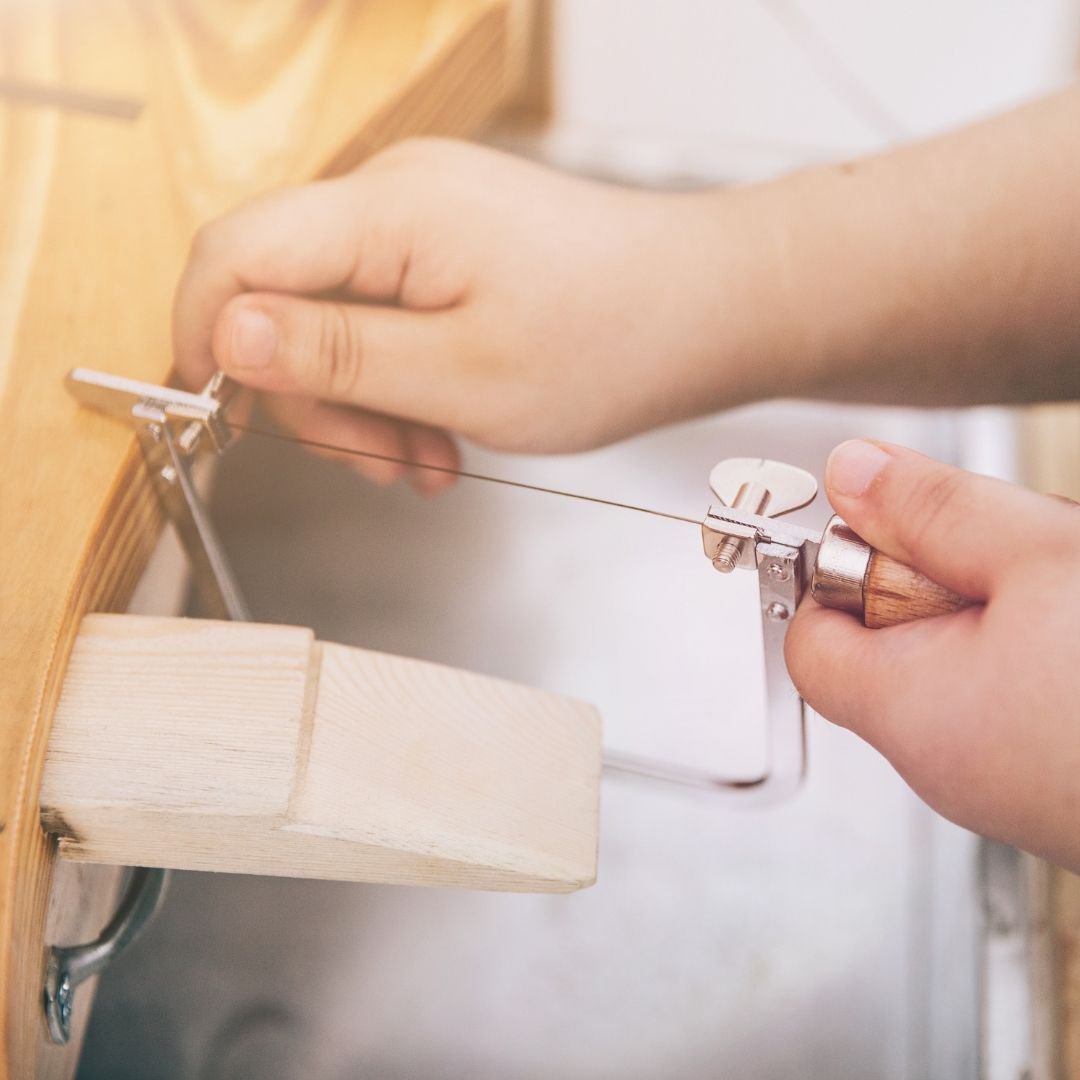
Sawing is a basic cutting technique commonly used in jewellery making. To fix the saw blade into the jewellery saw frame, make sure the teeth of the blade are facing down and pointing 'forwards' on the saw frame. Loosen the clamp screws, place the blade in the clamp furthest from the handle and tighten the clamp screw to hold the blade in place. Push the saw frame against the bench so it slightly bends, place the saw blade in the other clamp bracket and then tighten the second clamp screw. When properly installed, the blade should be absolutely taut. When cutting, make sure you are holding the material firmly with one hand. The downward action of the saw cuts into the material, as the teeth are facing downwards. To achieve a nice clean cut, make sure the saw frame is in an upright position and your movements are relaxed. Be sure not to push too hard with your sawing action - let the sharpness of the teeth of the sawblade do the work!

Sawing tips to remember:
Drilling
Saw-piercing a pattern or shape into the negative space in sheet metal requires drilling holes to insert the saw blade through. Drilling is done with a hand drill or a drill press. Drilling is literally piercing a circular hole into metal or other materials. The size of the hole can vary depending on your drill bit, the aim is to create a hole large enough for the saw blade to fit through. Safety glasses are required to be worn when using an electric drill press. Before drilling, always mark a point on the surface where you want to drill. This is done using a pen marker for plastic or wooden materials and a centre punch for metallic materials. When working with metals, mark the area with a pen, followed by the mark of a centre punch which will act as a guide for the drill bit. Hit the centre punch with a ball-peen hammer with moderate force. This will leave a dimple on the surface of the material for the tip of the drill to lodge into. When setting up the work to be drilled, make sure the work is secured. A vice or a clamp can be used for this. Adjust the height of the drill press and its position to your work. Before drilling make sure the drill fits into the dimple (centre punch mark). Turn the drill on and drill carefully.
*Please note - a safety induction for the drill press must be completed before using this piece of machinery. This is usually completed in one of your first classes or can be completed with a technical officer on request*
Bibliography T. McCreight, Complete Metalsmith – Student Edition, Brynmorgen Press, USA, 2004.
All drawings are rendered copyright Bic Tieu 2017.