There are four primary methods for securing stock onto a CNC machine for milling:
The choice of method will depend on the design being milled and the type of stock material being used.

_________________________________________________________________________________
With vices, the shape of the stock dictates our choice. Square stock requires machine vices, while circular stock is better suited for chucks or collar blocks. It's advisable to have at least 3 mm of the stock in the vice, although this may vary based on stock height, material removal, tool feed rate, and the tool itself.
The height of the stock in the vice can be adjusted with parallels. If the stock is too low in the vice then the endmill will cut into the jaws of the vice. This will break the endmill or damage the vice. If the stock is too high in the vice it will not be gripped securely and can fly loose when milling. This will probably break the tool, damage the machine and destroy your part.

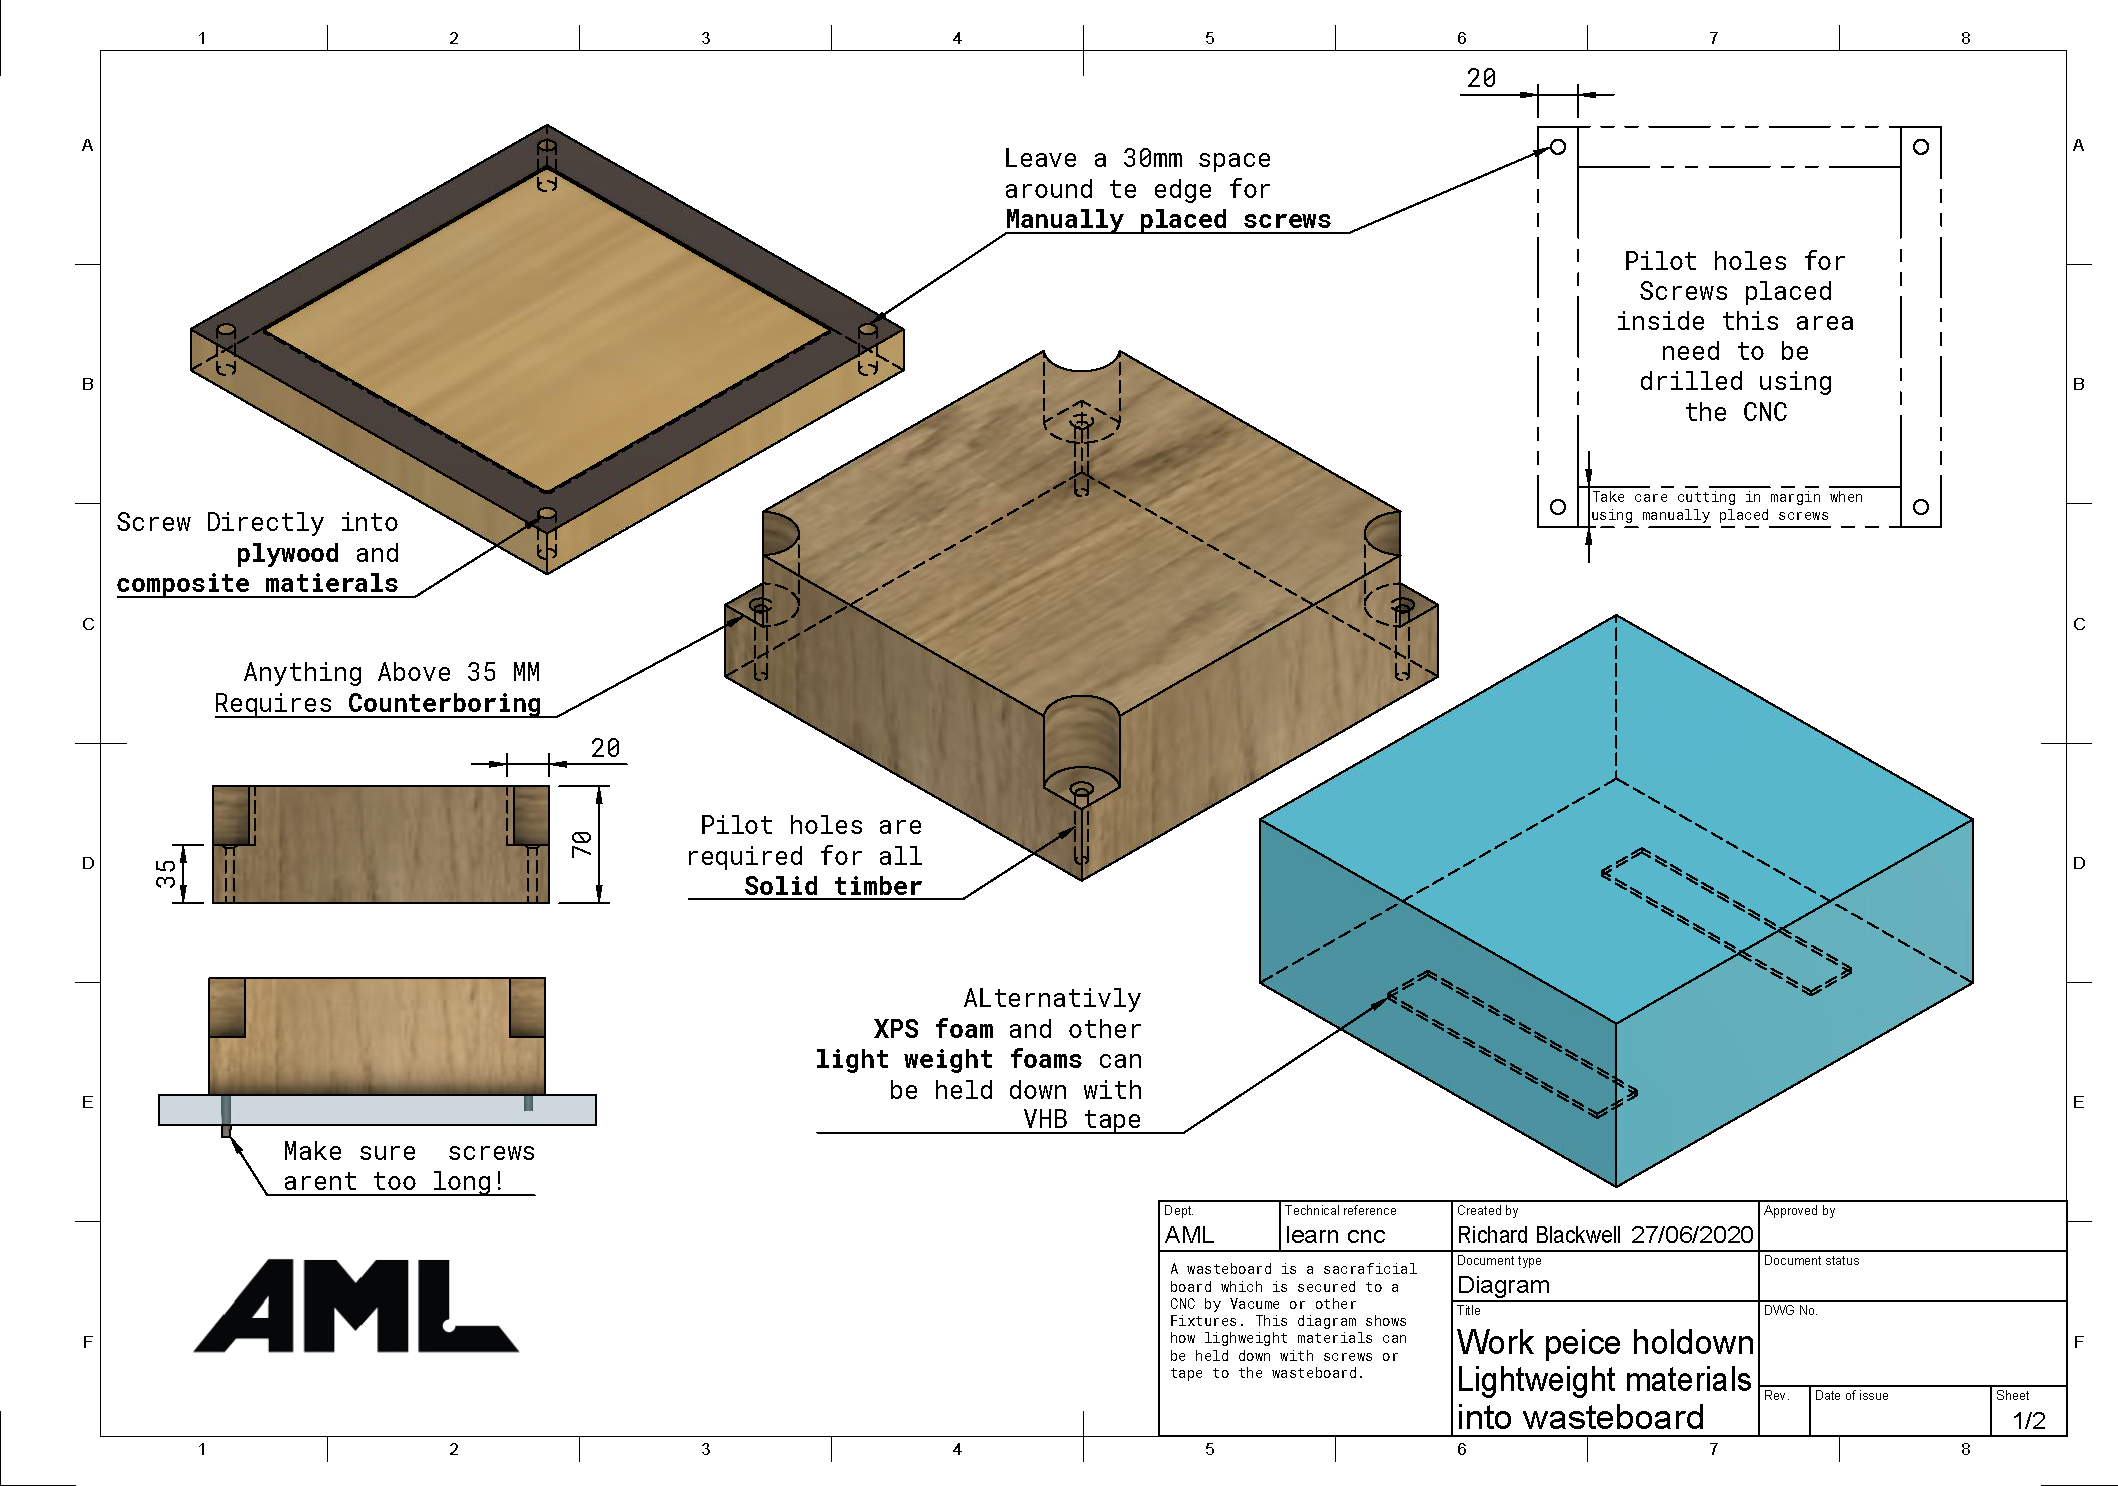
When securing your workpiece with screws, it's necessary to leave additional material around your design's perimeter to accommodate screw placement in the corners. Adequate clearance is essential to prevent the CNC bit from colliding with the screws.
For thicker materials (over 35mm), counterboring is needed to allow the screws to extend into the waste board, as shown in the reference image below.

Vacuum tables create a hold-down force due to the vacuum beneath the part and atmospheric pressure pressing down from above. Each square inch of area exposed to this pressure differential can experience a force of up to 6.6 kg (reflecting the difference between vacuum and sea-level air pressure).
The hold-down force depends on both the pressure difference and the surface area of the workpiece, meaning larger pieces are held down more firmly than smaller ones.
To maximize the hold-down force on smaller parts, non-porous materials like plastic can be used to block off other areas of the vacuum bed, concentrating the vacuum's effect (refer to the adjacent image).
Steps for using the vacuum table:
If the workpiece still moves after these steps, consider using an alternative hold-down method.


When dealing with intricate shapes or producing multiple identical pieces, traditional techniques might fall short. In these scenarios, using a specialized fixture or plate comes in handy. This fixture is secured onto the machine's bed to stabilize the workpiece. It's important to remember that creating the fixture involves extra steps, as it needs to be milled before use. The following video demonstrates the situations where custom fixtures are needed and guides on how to make them.
_________________________________________________________________________________
Sometimes, when removing material from stock, it’s necessary to leave tabs to prevent the piece from detaching and potentially flying off. Tabs are generally required when the design must be entirely separated from the stock. The video below illustrates how to create tabs using Fusion 360.
Leaving tabs is beneficial when securing the stock with screws, clamps, or vices, as they help hold the piece in place. However, tabs are not necessary when using a vacuum bed, since it will continue to hold the piece securely even after it has been outlined.
_________________________________________________________________________________
After fixing the stock material in the machine you need to tell the machine where the origin point is. This must match the origin location you set in the CAM program. It will normally be a corner or the center of your stock and can be set to the top or bottom of your stock.
If the part has been flipped for a second operation then it is important to probe on machined surfaces rather than the raw edges of the stock to set an accurate origin. This is often not easy because there is overhanging raw material from the previous operation. Fortunately you can probe touching surfaces to get an accurate estimate. This commonly includes probing on top of the parallels to set Z to the bottom of the part and probing on the fixed vice jaw to set Y. X is slightly more complicated but it is possible to clamp a parallel to the machined side of the part and probe it or in operation 1 machine past the bottom of the stock so there is no overhang when it is flipped.