UNSW Making

Photographing your Models

Where to start if you need to take pictures of your model

Photographing your process and finished models is an essential part of presenting your projects—both during your studies and as you build a portfolio for your future creative career. Strong images help your work stand out and communicate your ideas clearly.

This module will show you simple, effective ways to photograph your models, whether you're working at home or in the workshop. You'll learn how to set up and capture clean, professional-looking images ready for presentations and portfolios.

Planning to Photograph Your Model

Wide Angle

Wide Angle

Detail shoot

Detail Shoot

Angles Shoot

Angle Shoot

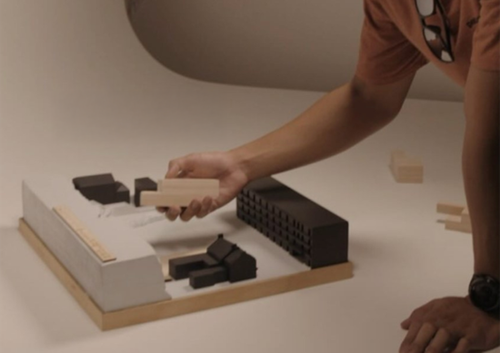
Before setting up lights, cameras, or tripods, take the time to carefully study your model. Good model photography starts with a clear intention—what do you want your images to communicate?

Start by considering the following:

Understand Your Model

  • Examine its form, materials, textures, and colours
  • Identify the most striking features or key design elements you want to highlight

Visualise the Outcome

  • What kind of image are you aiming for?
    • A wide shot showing the model in context?
    • A close-up to show fine detail or texture?
  • What angle will best represent your design?
    • From above (plan view), eye level (human perspective), or low (monumental feel)?

Think About Lighting

  • Do you want to highlight surface textures with side lighting?
  • Will the image benefit from soft, diffused light or more dramatic, hard shadows?
  • Should the lighting make the model appear warm and tactile or cool and sharp?

Form a Plan

Even if your equipment is limited, it's important to formulate a clear idea of how you want the model to look. This will help guide your setup and make the most of the tools you have available.

Next, we’ll go over camera settings, lighting setups, and practical techniques to help you bring that vision to life.

Photography in the Design Futures Lab

Photography at Home

Editing your Photographs

An excellent choice of software for managing and editing your photos is a combination of Adobe Bridge, Camera RAW and Photoshop, all of which are included in Adobe CC subscriptions.

Adobe Bridge is a stand alone application used to view, compare and sort your photos. You can assign ratings to the photos you want to keep, or delete photos you don’t need. You can also perform operations such as re-ordering, renaming and outputting files to other sizes and formats. Many of these functions can be done to multiple files simultaneously in order to save time. There are a number of default workspace arrangements to choose from (top centre of window). A good one to start with is “Filmstrip” mode.

Adobe Camera RAW is a plugin for Adobe Bridge and Photoshop, used to edit and enhance your images. Watch this video for a brief introduction.

The main components you should be familiar with are:

  1. Exposure
  2. White balance (temperature & tint)
  3. Contrast
  4. Straighten & transform
  5. Crop
  6. Resize
  7. Output

Often, less is more, so avoid being heavy handed and only do what you feel you need to!

If your images need more detailed fine tuning, advanced editing and compositing, then Photoshop is the next step in the workflow. However, in most instances you won’t need it for the simple editing procedures that we are concerned with here.

To explore either of these programs, or the more advanced editing features of Photoshop, you can search for tutorials on the Adobe Website, or via a Youtube search of whatever it is you are trying to do.

Tags: photography