
Quick Links
This is a guide to Laser cutting with Trotec Job Control, the software used to control the laser cutters in the Renewables Makerspace, as well as the Design Futures Lab.
We are assuming you already have a file ready to import into Rhino, if you'd like tips on how to design your file or you're a design and architecture student check out our detailed guide here!
Before you can use laser cutters first you have to complete the Workshop Safety Badge to gain access to the makerspaces
In order to use the laser cutters first you must start the Laser Cutting Badge and read the SWP

Follow this guide for instructions on how to send your file to the laser cutter.
For tips for creating your file for laser cutting check our learn page here
 ENG MS Opening Hours
To complete the practical component of the laser cutting badge come into the makerspace and follow this guide.
Ask a staff member to check your work before you cut and feel free to ask for help if you have any questions!
Open the template file on the computers and import your file.
Use the Distance command in rhino to check that it has imported in the right size, and the Scale command if you need to change it.
Select all of your paths and Join to reduce the runtime of your job
Change your paths to the desired layers.
Ensure all of your inside paths are on the Cut 1 (Pink/Magenta) layer and your outside paths or outlines are Cut 2 (Red) layer.
Any paths you'd like to be engraved need to be on the Engrave layer and they need to be a Hatch or solid shape.
Select the paths you would like to send to the laser cutter and print to Job Control by going File -> Print or using the Ctrl + P shortcut
Lift up the lid of the laser cutter and place your material on the bed.
Focus the laser by placing the focusing tool on the ridge of the laser cutter head, and then raising the bed (the Z axis on the controls) until the material contacts the focusing tool and it falls off.
Under the Job Queue in Job Control click and drag your job into the plate and position your job on top of your material.
Use the laser cutter crosshair (the red dot) to help you reference.
Remember to use vector ordering to make your job run faster
Select the correct category and thickness of your material. talk to a staff member If you are unsure.
Run your job by pressing the play button on the bottom right

Never leave the laser cutter running unattended as the laser cutter is a fire hazard.
In the case of a fire stop your job immediately by pressing the E-Stop button and call for a staff member to help.
Once we have our designs we need to export them into a 2D vector file format.
Common vector file types include
For our laser cutters we recommend a .dxf or .3dm file as they work best with our laser cutter software.
For making your designs we recommend using our Template for Rhino3d which is available on all the computers in the makerspace network as well as from home via MyAccess.
However if you have already been taught how to use Solidworks or Fusion360 as part of your degree there is no need to learn how to design in a new software from scratch, just follow the instructions below on how to export your files to a DXF.


Once you have made your design in solidworks save your file as a .dxf and then select which view you'd like to export and save.
Take care to ensure you've selected the correct view or face of your design. The laser cutter will not accept 3D files, you must choose which 2D face you'd like to laser cut.

To export a dxf from Fusion360 right click on the sketch you'd like to export and click "Save as DXF"


If you'd like to create a sketch to export from a solid shape you need to use the "Project" tool.
To do this create a new sketch, then under the sketch -> create tools go to Project and select the geometry you would like to add to your sketch then press OK.
you should now have a new sketch that you can export as a .dxf to send to the laser cutter
Other CAD Software programs such as; Adobe Illustrator, Inventor, Tinkercad, SketchUp, Onshape, and Inkscape - are all fine to use. However there is no guarantee any of our staff will have proficiency in these programs and we may not be able to help you if you are struggling.

There are 3 laser cutters in the space, each has a computer next to it with rhino and template installed on it. load your file onto a usb and then insert into the computer and import into the template.
Instructions are provided in the template file. You can import many vector file types into these templates but we recommend a .dxf
If you can't find a usb or usb C adapter ask a staff member and we can help you
If there's a long line or wait for the laser cutter it will be quicker for you to download the template online and do the file setup before you get into the makerspace.
Before sending your job to the trotec laser cutter do these checks
Watch the video for tips on how to check the size of your job using distance, scale your designs if you need to, and join your paths.
Assign your paths to the appropriate layers, the different layers correspond to different instructions for the laser cutter. The Magenta/Pink "Cut 1" layer will cut first and is used for internal cutting paths, the Red "Cut 2" layer will cut second and is used for external cutting paths or outlines.
Any paths you'd like to be engraved need to be on the Engrave layer and they need to be a Hatch or solid shape.
To assign your paths to a different layer first

Watch the video for tips on how to select lines and change their layer, and how to check that your view options are all set to "By Layer"
Job control is the software that we use to control the trotec laser cutters, in order to send our jobs to the laser cutter we must "print" them to Job control first.
To send a file from Rhino to Job Control first select all of the geometry you would like to print. Make sure you are only sending one ‘page’ to print at a time.
There are a couple of ways you can send your job to print once it has been selected
- Type Print in the command bar
- Press CTRL + P
- Click File > Print
In the print preview window, check you can see your job and that all colours and lines are correct. If you can’t see your job then check you selected your curves and keep reading below!
Make sure the destination is set to Trotec Engraver. You should not need to change any of the other settings in this pane.
Ensure the view/output scale pane has the TOP view selected and that the ‘Extents’ option is chosen. If you cannot see your job in the preview window then you can try selecting the ‘Window’ option and setting a new window for printing. Chat to staff if you need help with this!
Watch the video for tips on how to select your desired paths and send to Job Control
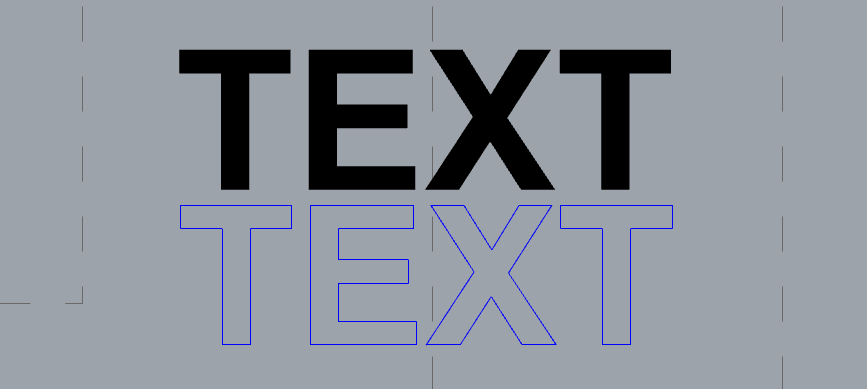
Engrave is a solid fill, cut or score is a hairline curve, If you try to engrave a hairline curve it will not work.
To fill a shape for engraving use "Hatch" command . To extract curves from a solid or hatched shape use the "DupBorder" command.
Double check you have no overlapping objects or duplicate lines. To fix this you can use the commands 'Make2D' or 'SelDup'.

Minimize material waste.
Nest your objects placing linework close together using the "Move" or "Rotate" commands in RhinoThe minimum distance between linework should be 2mm but may vary according to the material.


Every time we put in a new material into the laser cutter we have to focus the laser.
In order to focus the laser
Try to make sure your material is completely flat, if your material is warped you can try to tape it flat to the bed of the laser cutter using masking tape.
Watch the video for tips on how to position the focusing tool and focus the laser
Job control is the software we use to control the trotec laser cutters.
Under the Job Queue in Job Control click and drag your job into the plate and position your job on top of your material. Make sure you delete any old jobs left on the job plate.
Use the laser cutter crosshair (the red dot) to help you reference. If the crosshair is not appearing in Job Control check that the computer is connected to the laser.
Remember to use vector ordering to make your job run faster, either click the vector ordering button on the top of the screen or right click on your job and select "Vector Ordering"

Watch the video for tips on how to drag your job into the job plate in job control and position your job
Select the category and thickness of the material you are using.
Talk to a staff member if you are unsure, selecting the wrong material can result in your material catching fire or not cutting through.
After you have focused the laser, positioned your job and selected your material, run your job by pressing the play button on the bottom right.
watch the video for tips on how to select your material and send your job to the laser cutter


| Command | Function |
|---|---|
| Join | Merge selected objects |
| Explode | Unmerge selected objects |
| Move | Move selected objects |
| Rotate | Rotate selected objects |
| Distance | Measure distance between two points |
| Scale | Resize selected objects |
| Scale 1D | Resize selected objects in 1 axis |
| Line | Create lines |
| Rectangle | Create rectangles |
| Circle | Create circles |
| Trim | Delete selected intersecting lines |
| Split | Split selected objects |
| Fillet | Round corners |
| Chamfer | Chamfers corners |
| Hatch | Create a filled shape from a closed curve |
| DupBoarder | Create closed curves from filled shapes |
| SelDup | Select duplicate lines |
| Make2D | Create curves from surfaces or objects |
| Array | Create multiple copies of objects in an array |
| Osnap | Toggle snap controls on and off |
| Ortho | Toggle orthogonal controls on and off so you can move objects in every direction |
| Gumball | Toggle gumball on and off |
| Flow | Align objects or text to a curve |
For more information and detailed commands, click here for the full command guide!

Trying to make a laser cut box? Need a custom enclosure for your Arduino Mega? Want to create a custom engraved box for a gift? There's a web app for that: MakerCase
This web app generates laser cut-able files from the specific dimensions you need - feel free to download the file and adjust it with engraves, holes and any other features you may need!
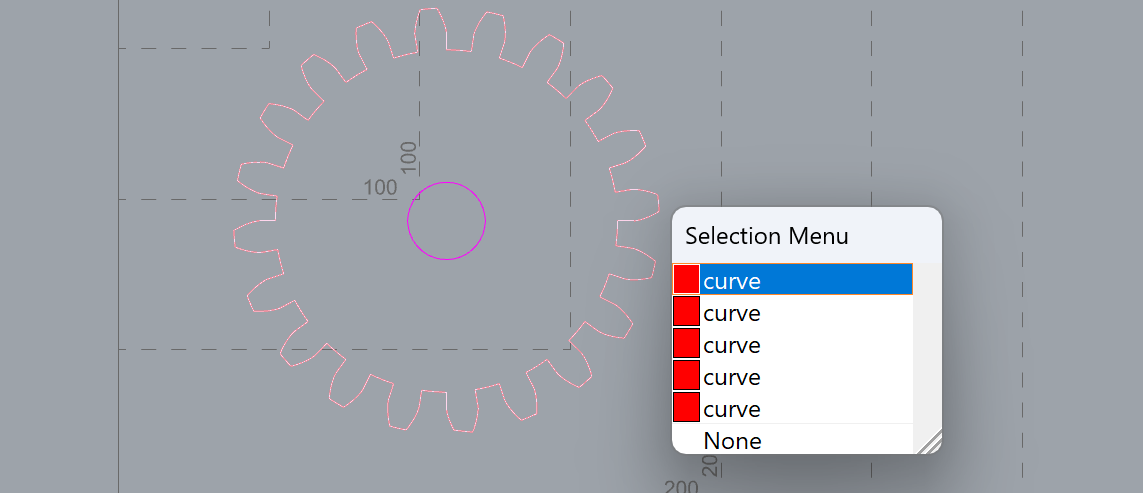
If you're in need of any gears for your robotic arm or want more torque out of your small hobby DC motors, use this Gear Generator to create laser cut gears!

