
This module will form part of the 3D Printing Badge, to complete this module you will need:
______________________________________________________________________
Bambu Studio is a free slicing software used to prepare files for 3D printing.
To make a 3D print, a digital file needs to needs to be 'sliced' into layers, which the 3D printer follows.
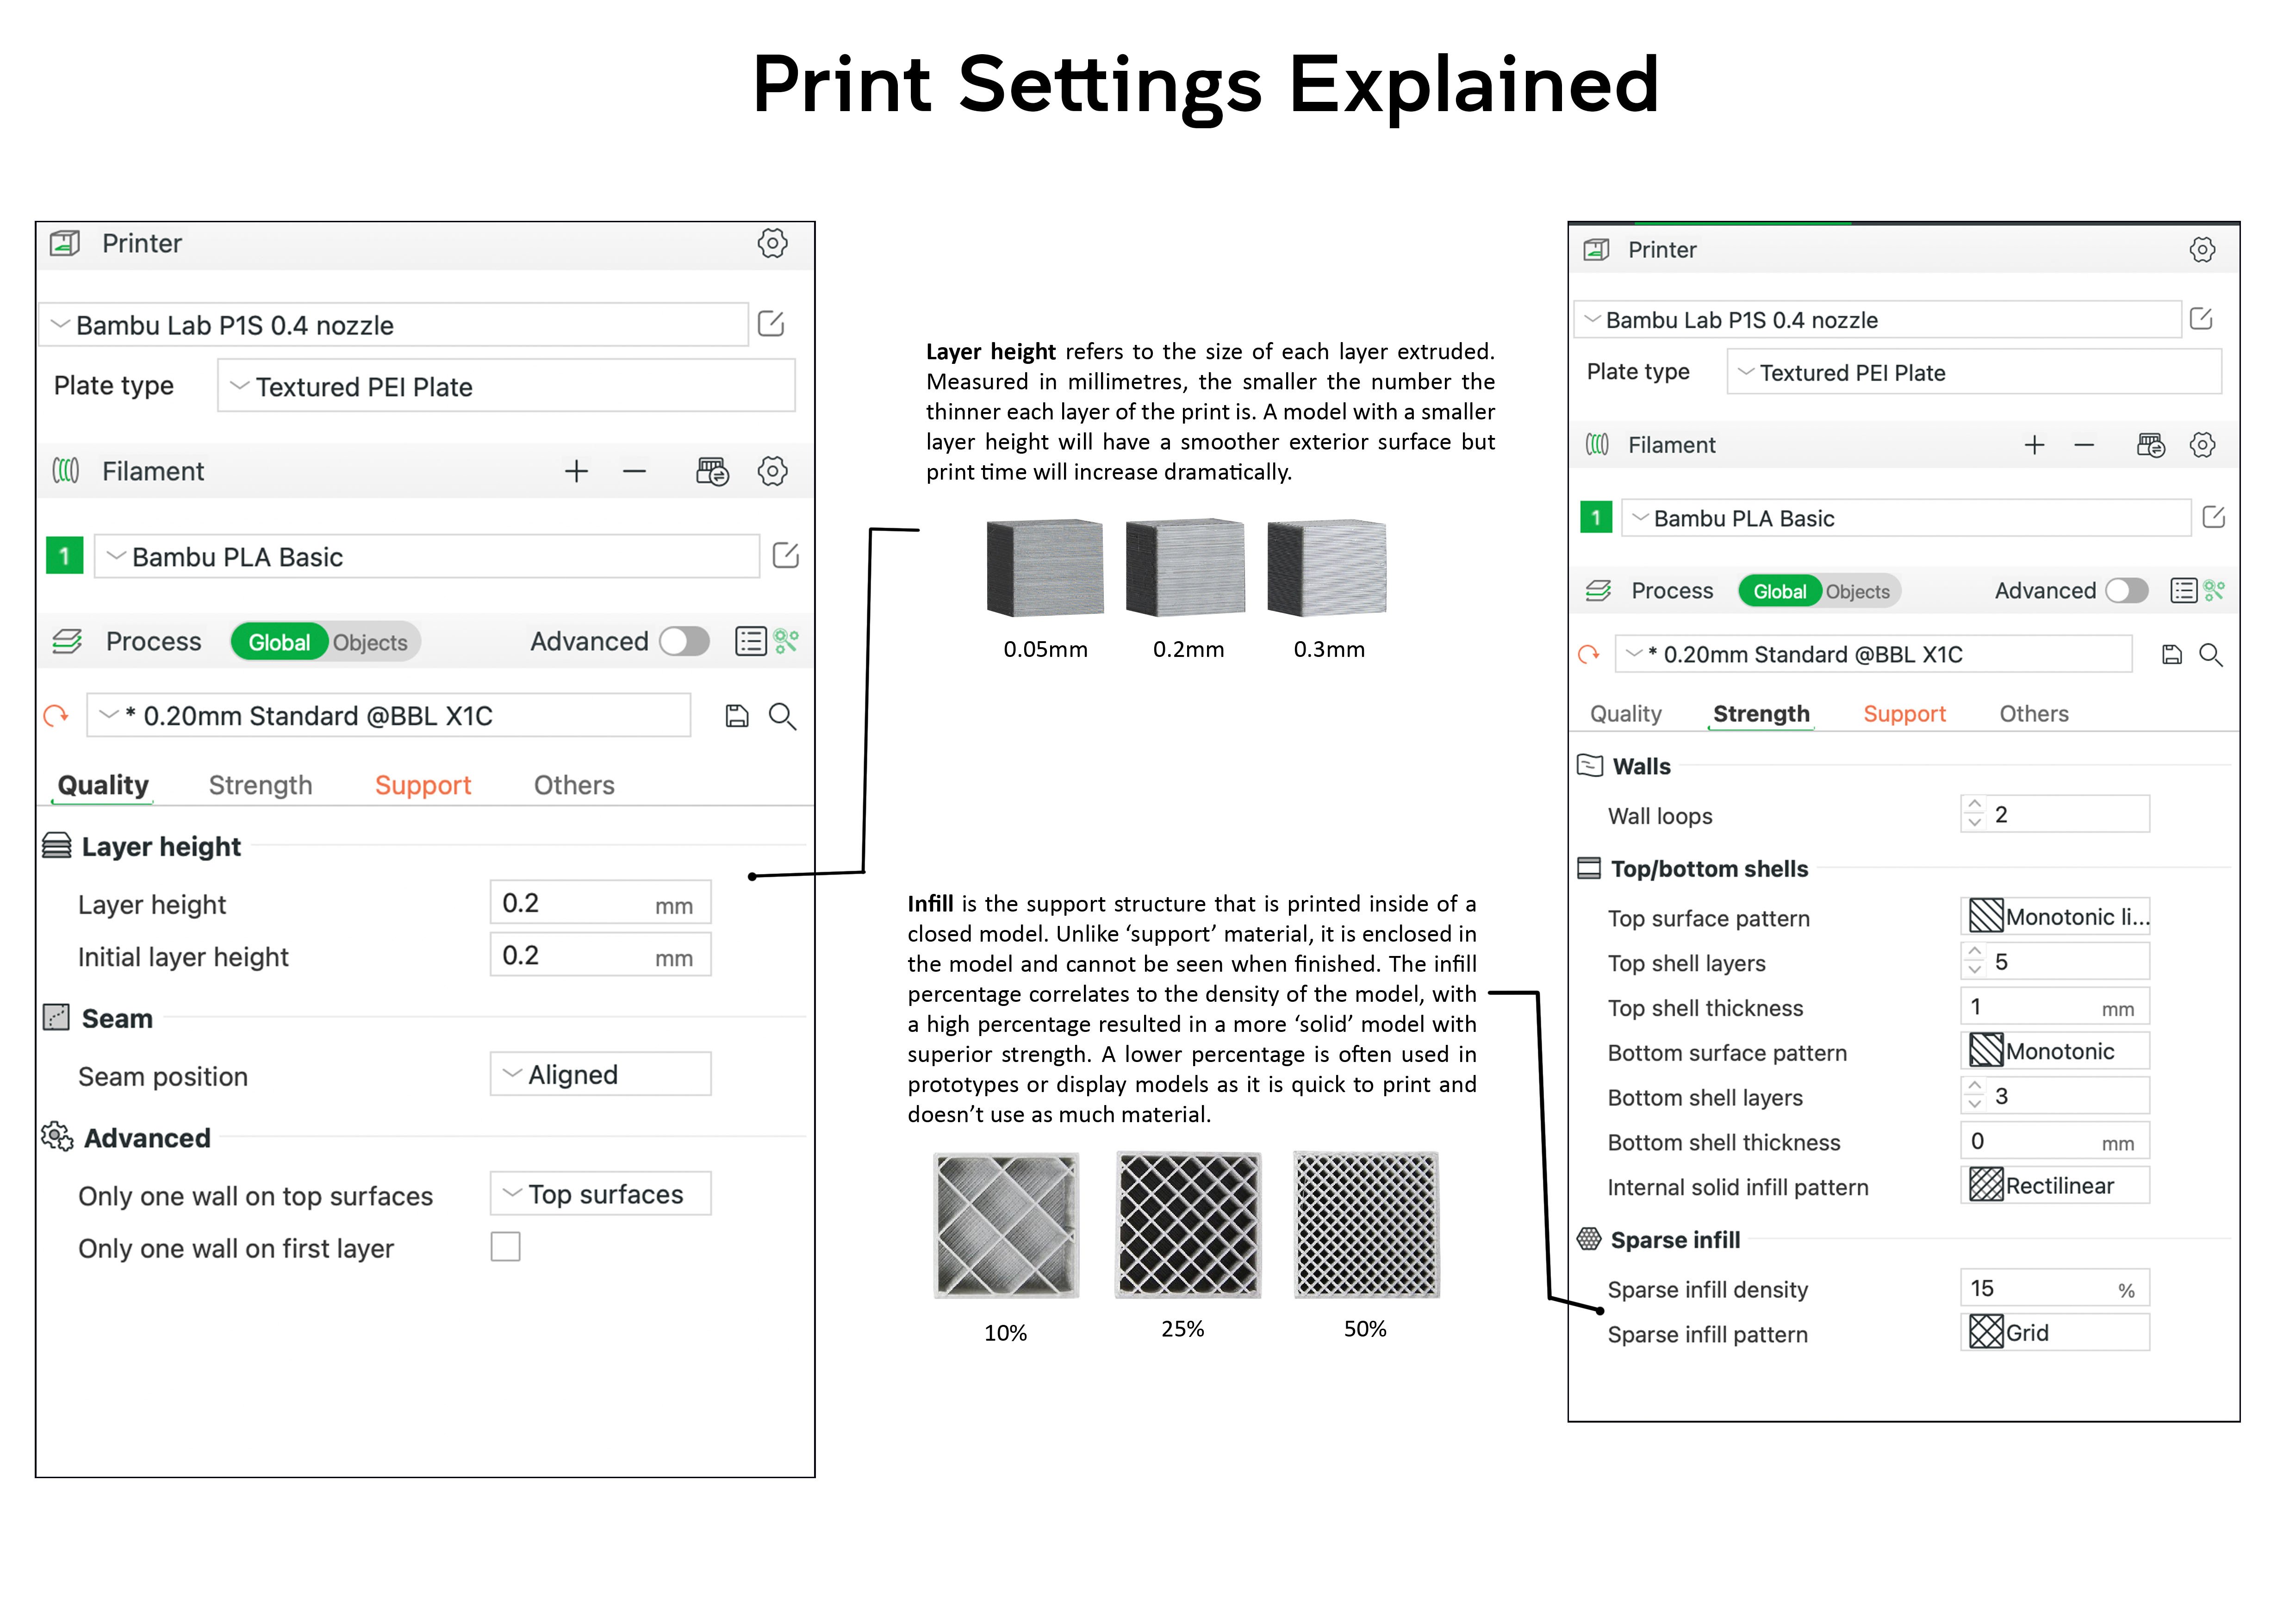
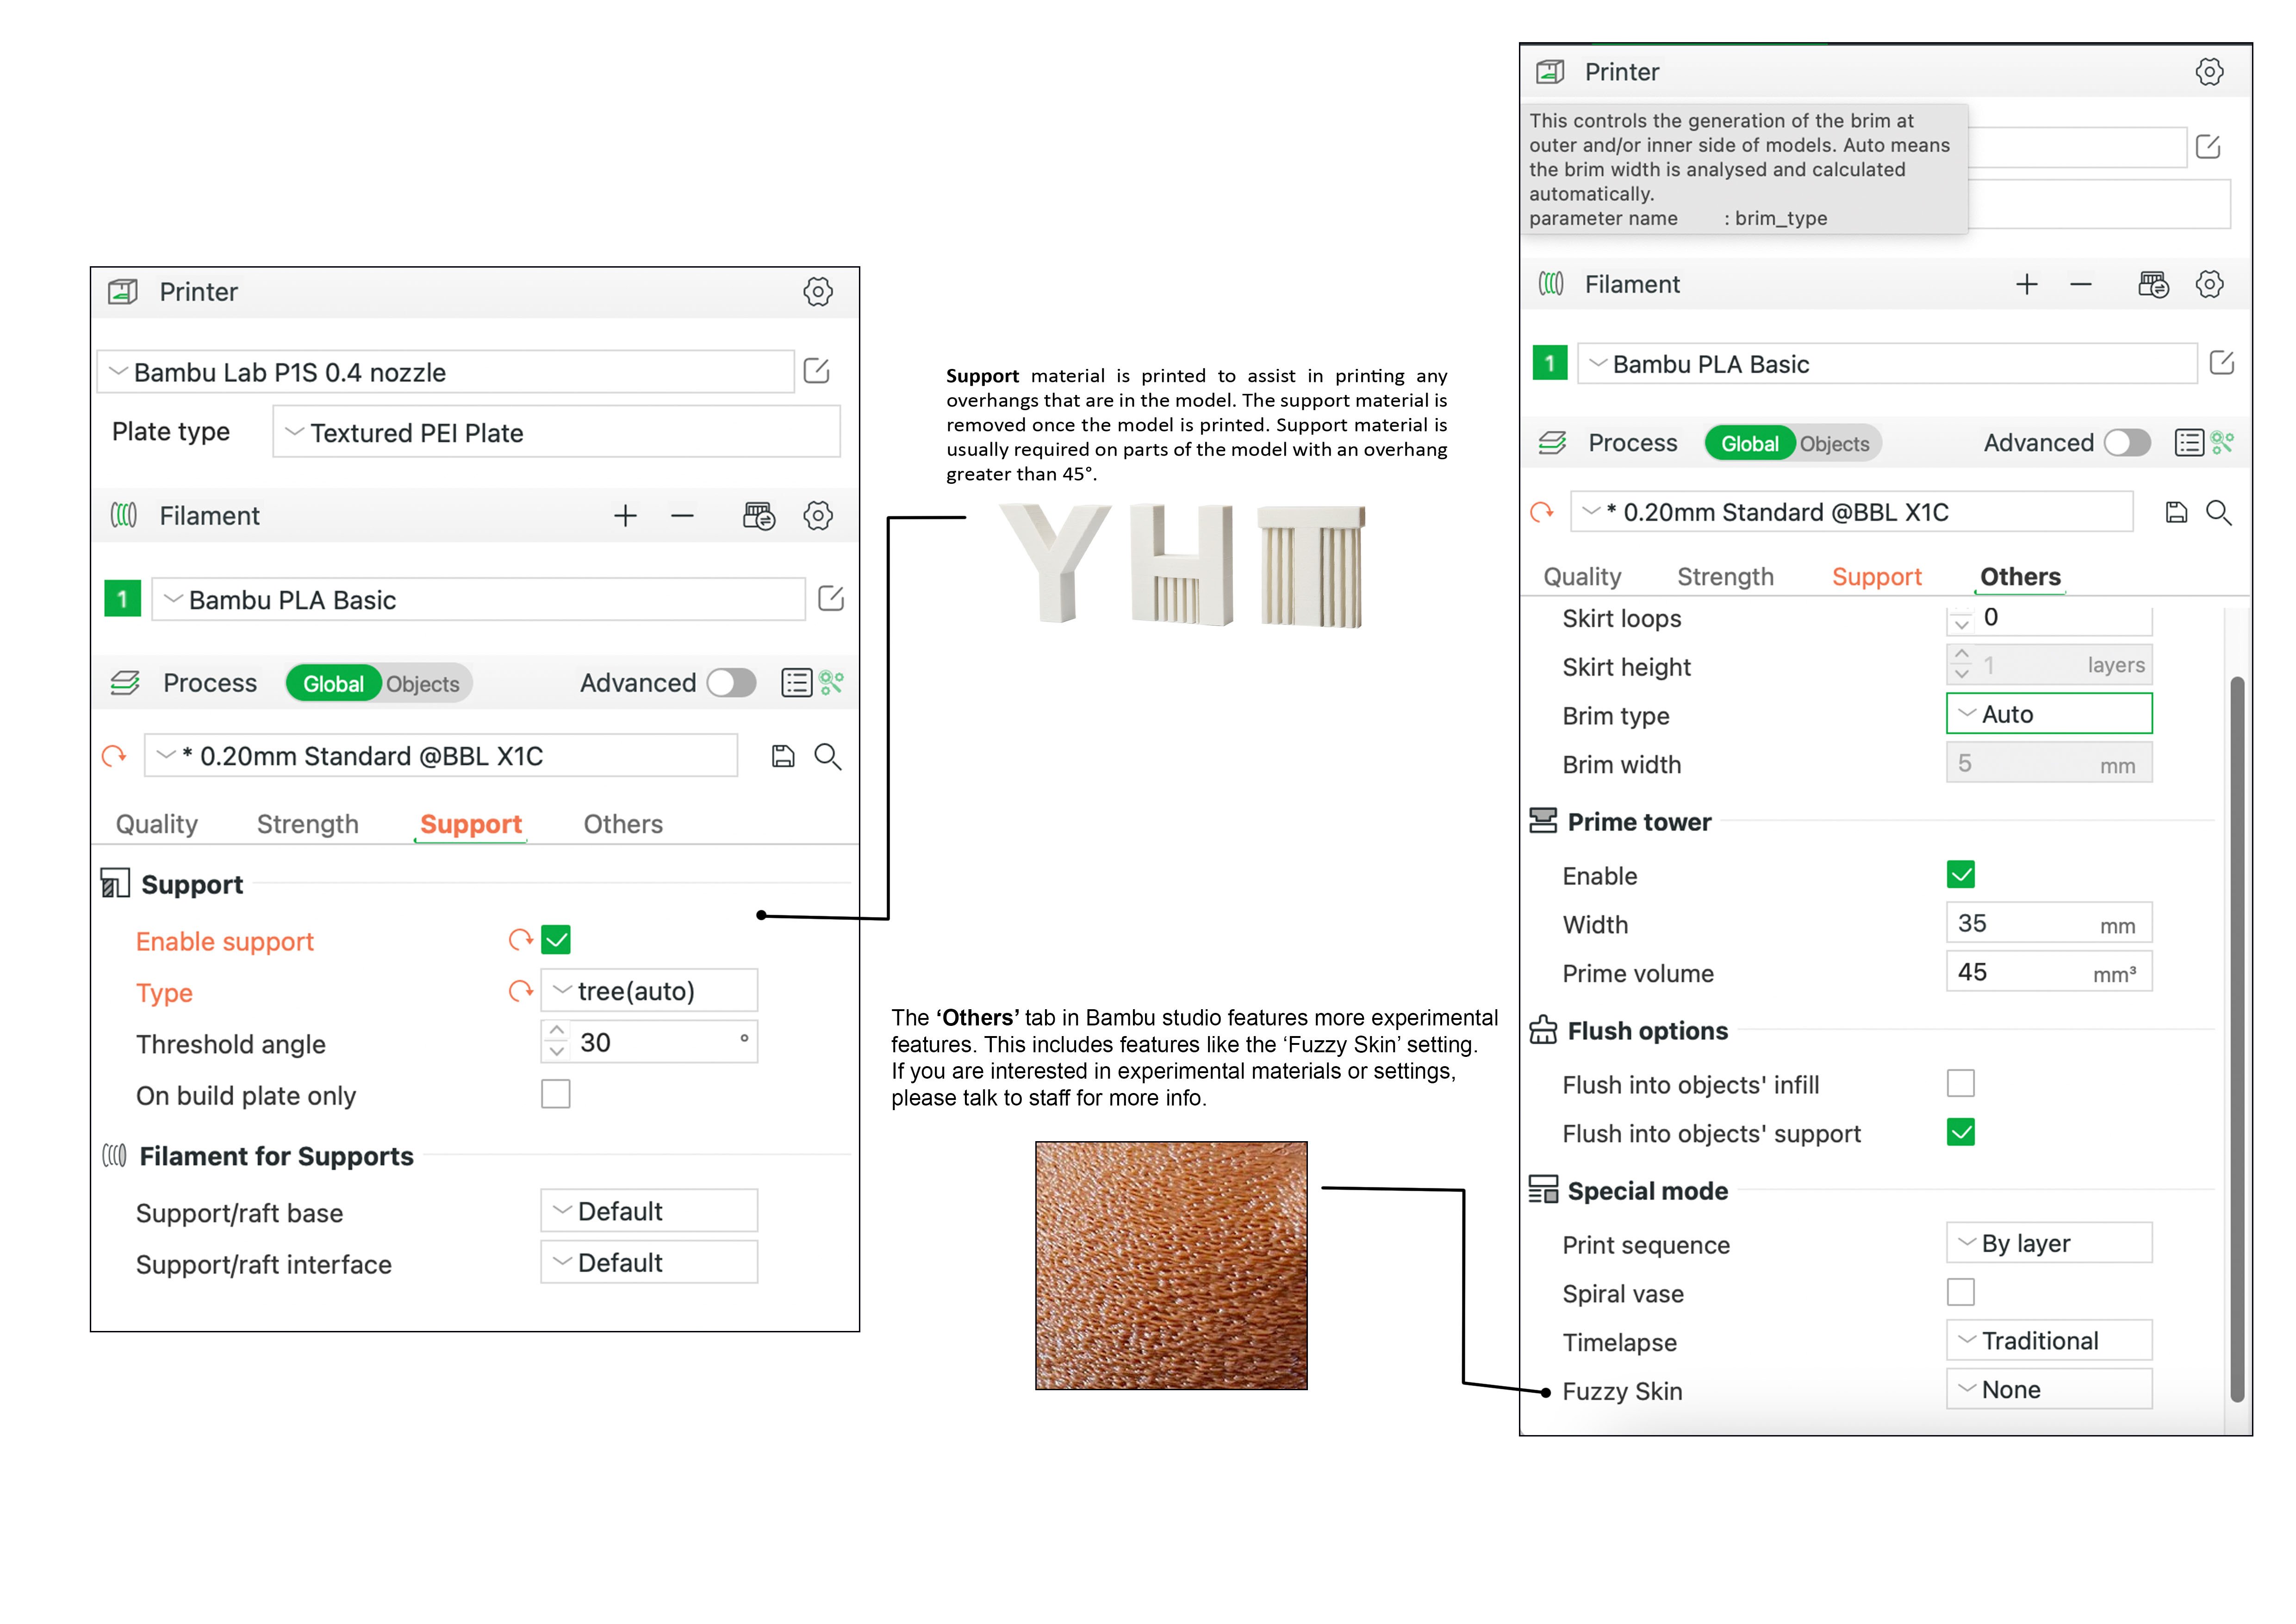
Slicing software like Bambu Studio generates the G-code for the 3D printer. It will open and read your 3D CAD drawn model (in the form of a .STL or .OBJ), slice it up into lots of layers and convert those layers to lines of code that become the instructions for the 3D printers to follow.
We recommend checking every 3D print in Bambu Studio before submitting your prints to the 3D Printing Hub
You will need this for the Digital Fabrication Induction!
Instructions
1. Download Bambu Studio and install it on your laptop.

2. The majority of UNSW Makerspaces have Bambu Lab 3D printers. Go through the Setup Wizard and select the P1S 3D Printer with a 0.4mm nozzle

3. Now, we need to select the plastic filament used in the lab. Choose 'Generic PLA' from the options

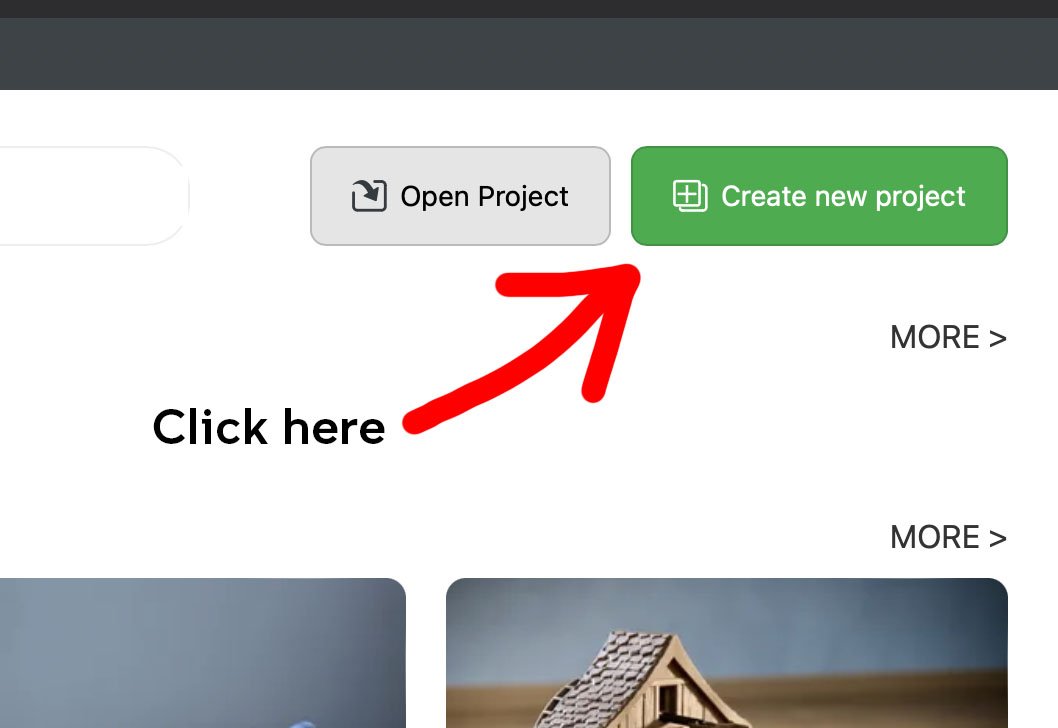
4. Now simply create a new project
5. Drag the demo file into this window to practice slicing. You will mainly use Bambu Studio to preview your file before printing and to estimate print time, rather than sending files to print directly.

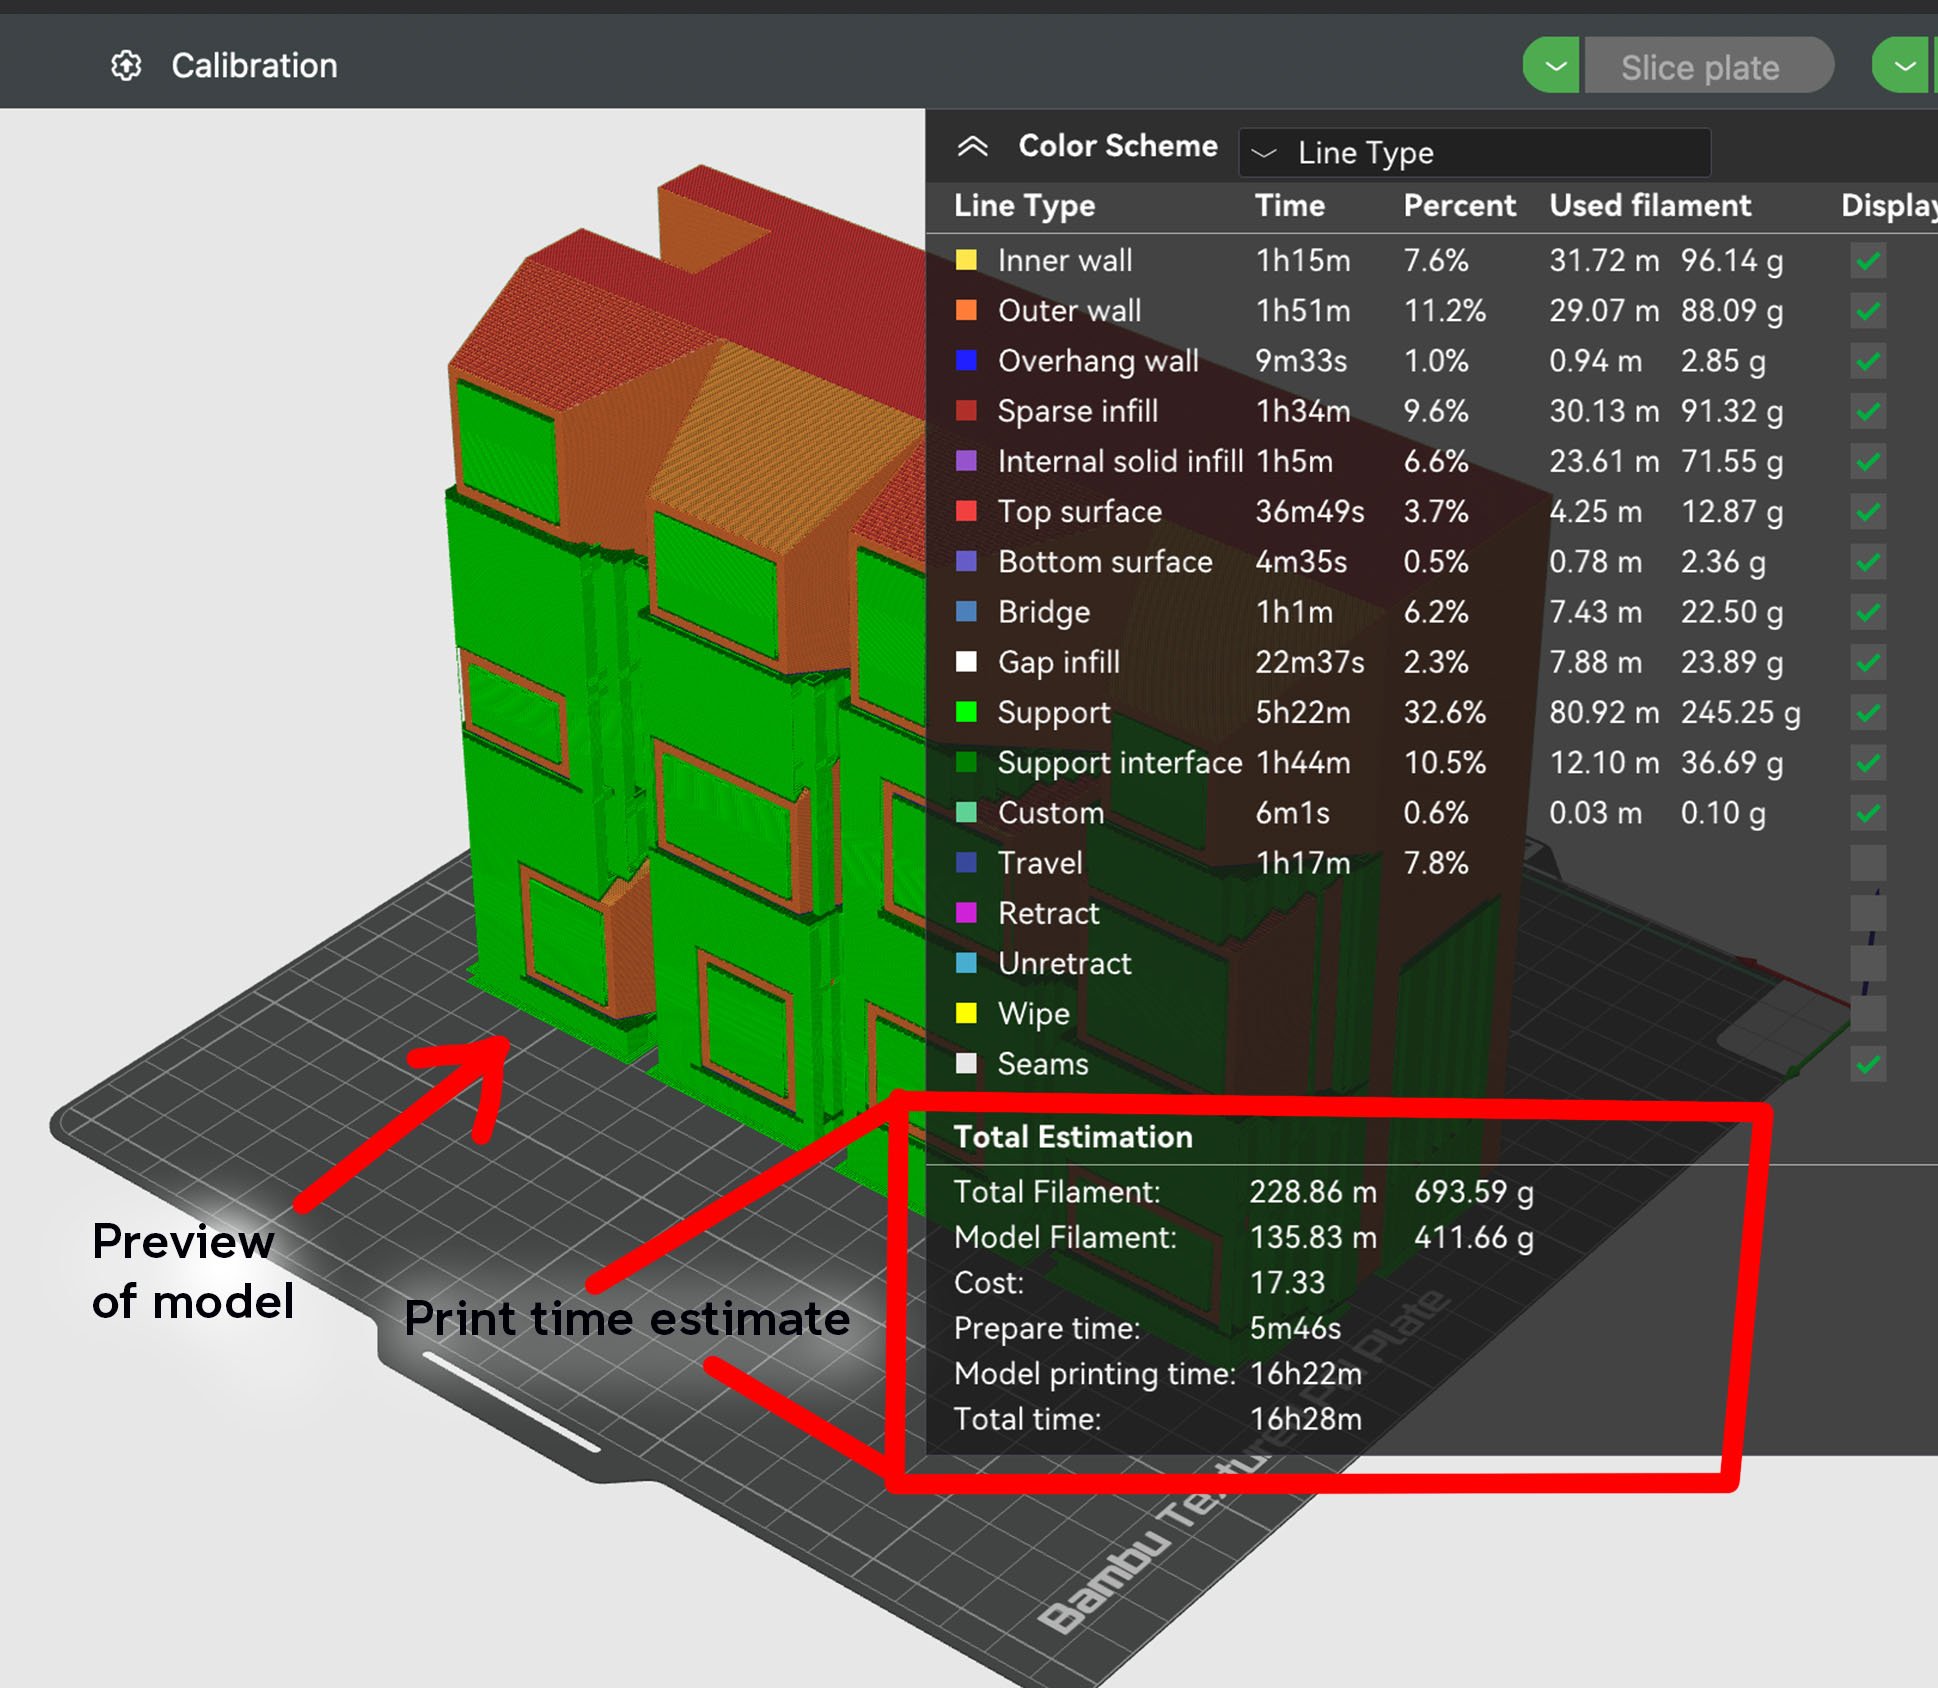
6. Press 'Slice Plate' to run the slicing software.

7. You will now get a preview of the prepared file, showing the actions of the printer, the supports and total print time. You will be alerted to any potential errors and can preview how your print will look via this screen.
8. You can also use tools like 'Rotate' in Bambu Studio to optimise your 3D print for quality and print speed

___________________________________________________________________________________________
___________________________________________________________________________________________
DO NOT USE SKETCHUP FOR 3D MODELLING! Sketchup is very bad for creating models for 3D printing.
If working in Rhino ensure that your model is watertight and that all surface have been joined (see Rhino for 3D printing tutorial in the resources section).
You can use the 'Showedges' command to detect any naked/unjoined edges in your Rhino file.
When first opening the model in Bambu Studio, check warnings. These are areas of the model that may be non-manifold, broken geometry or inverted faces.
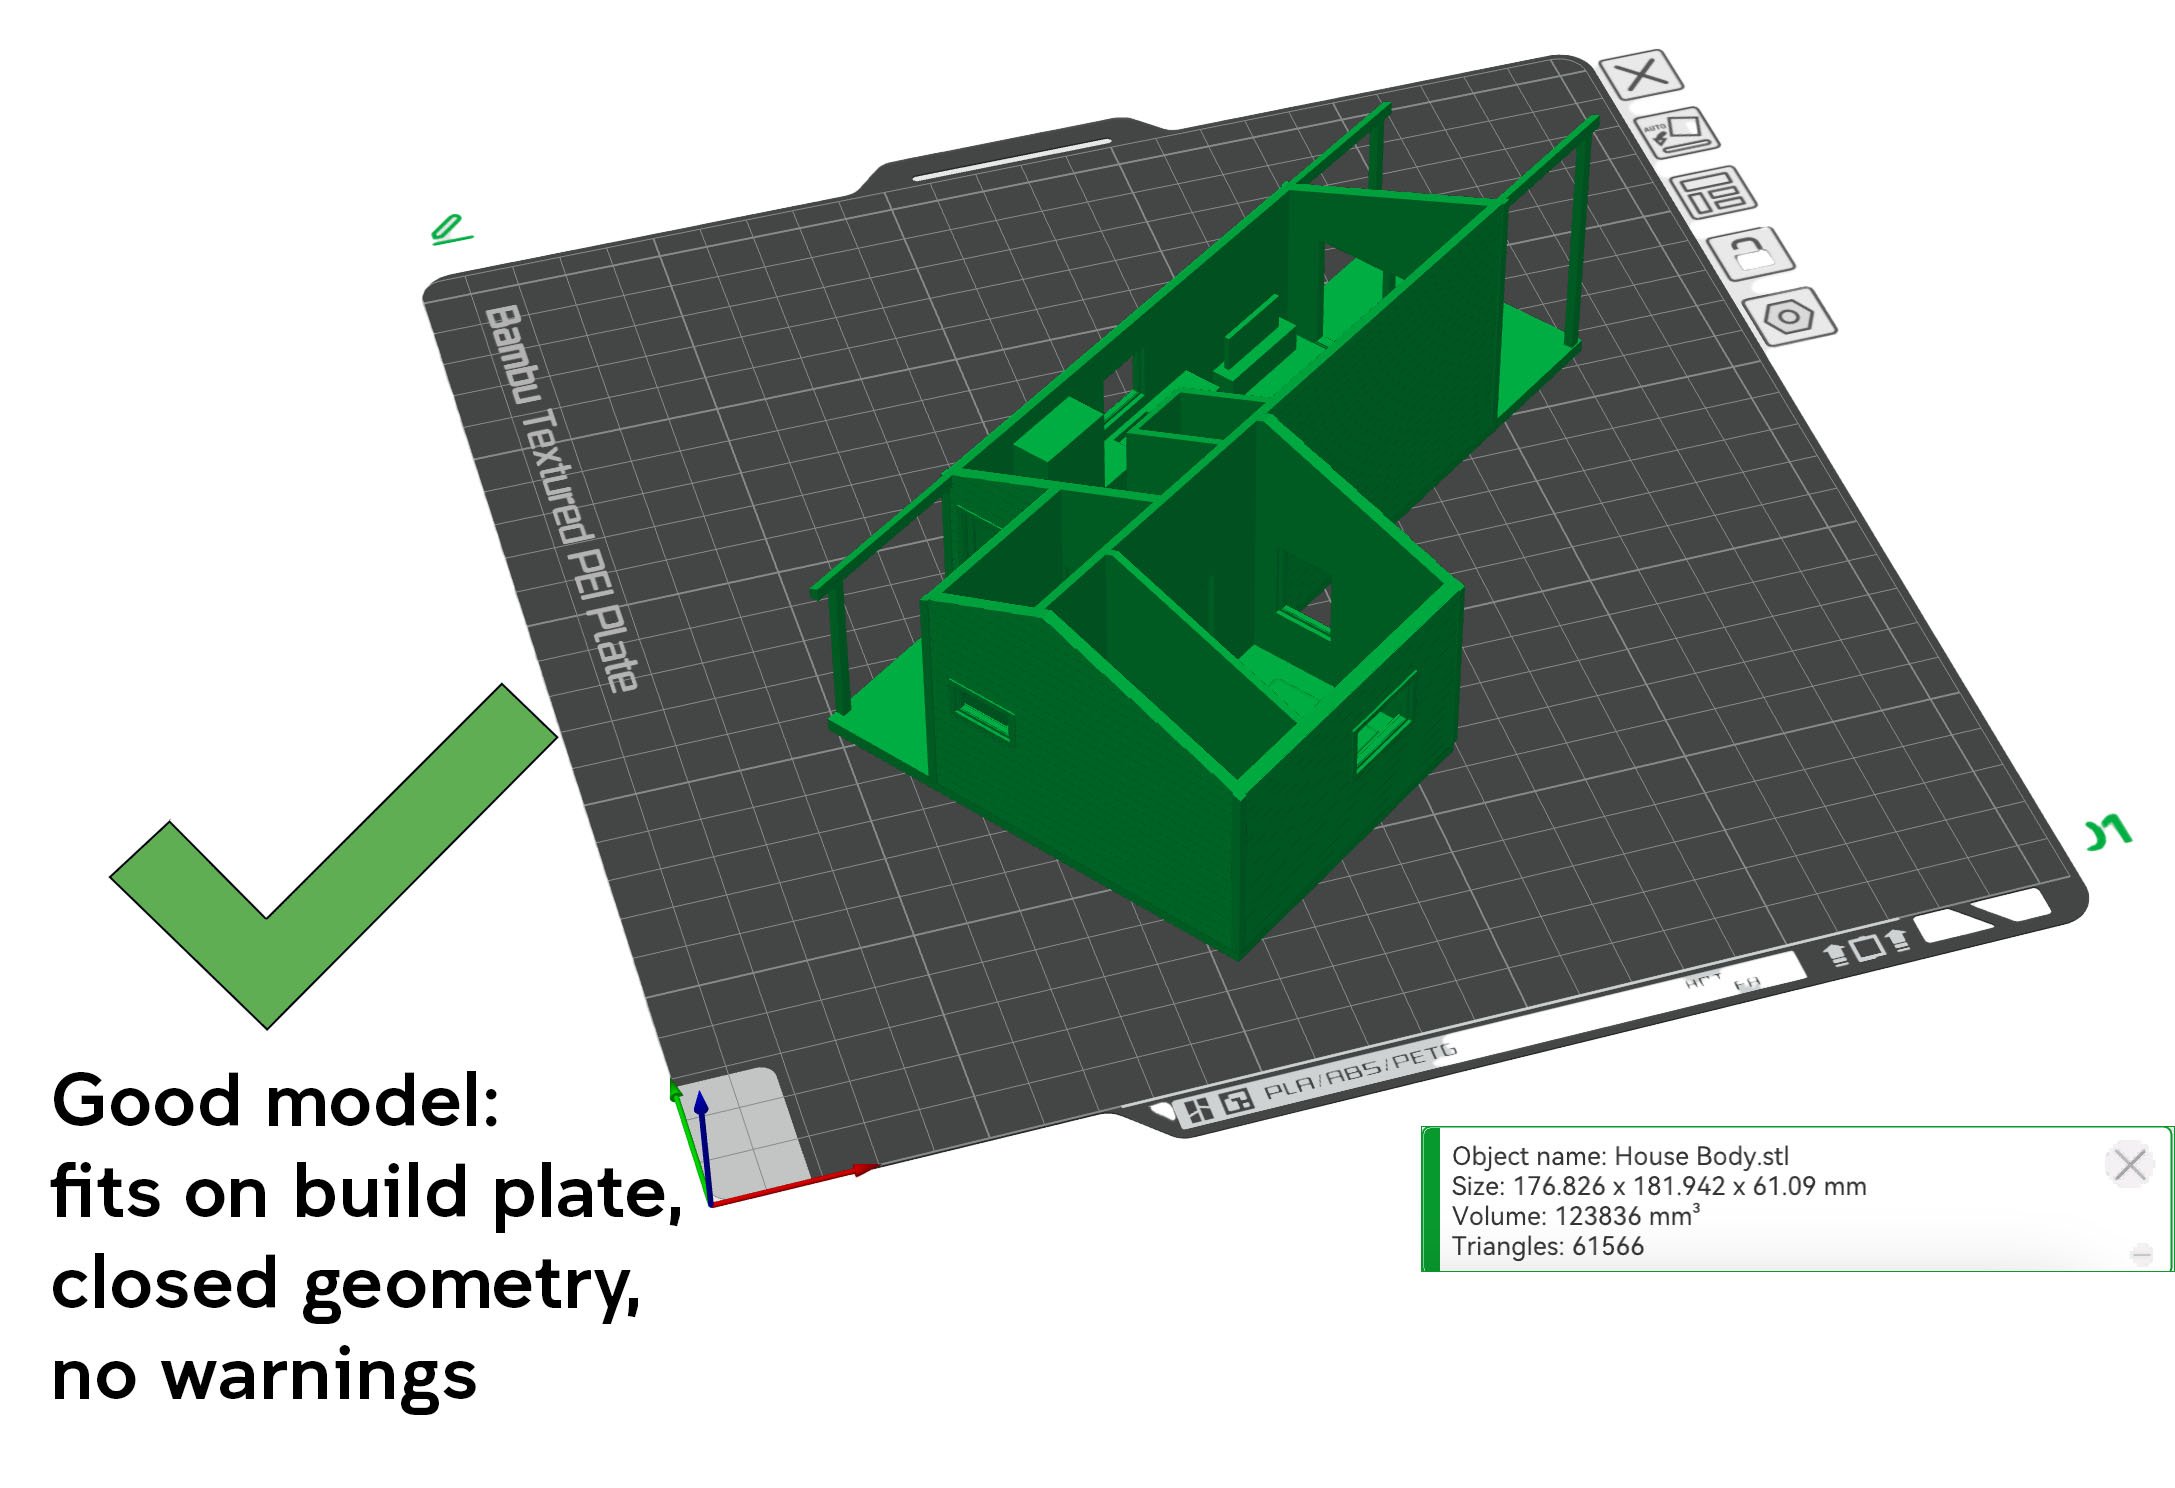
Always check the preview before uploading your file. Areas that have errors or don't fit in bed will not print. The way the file appears in Bambu Studio is how it will print, so you need to check dimensions and the design is correct.

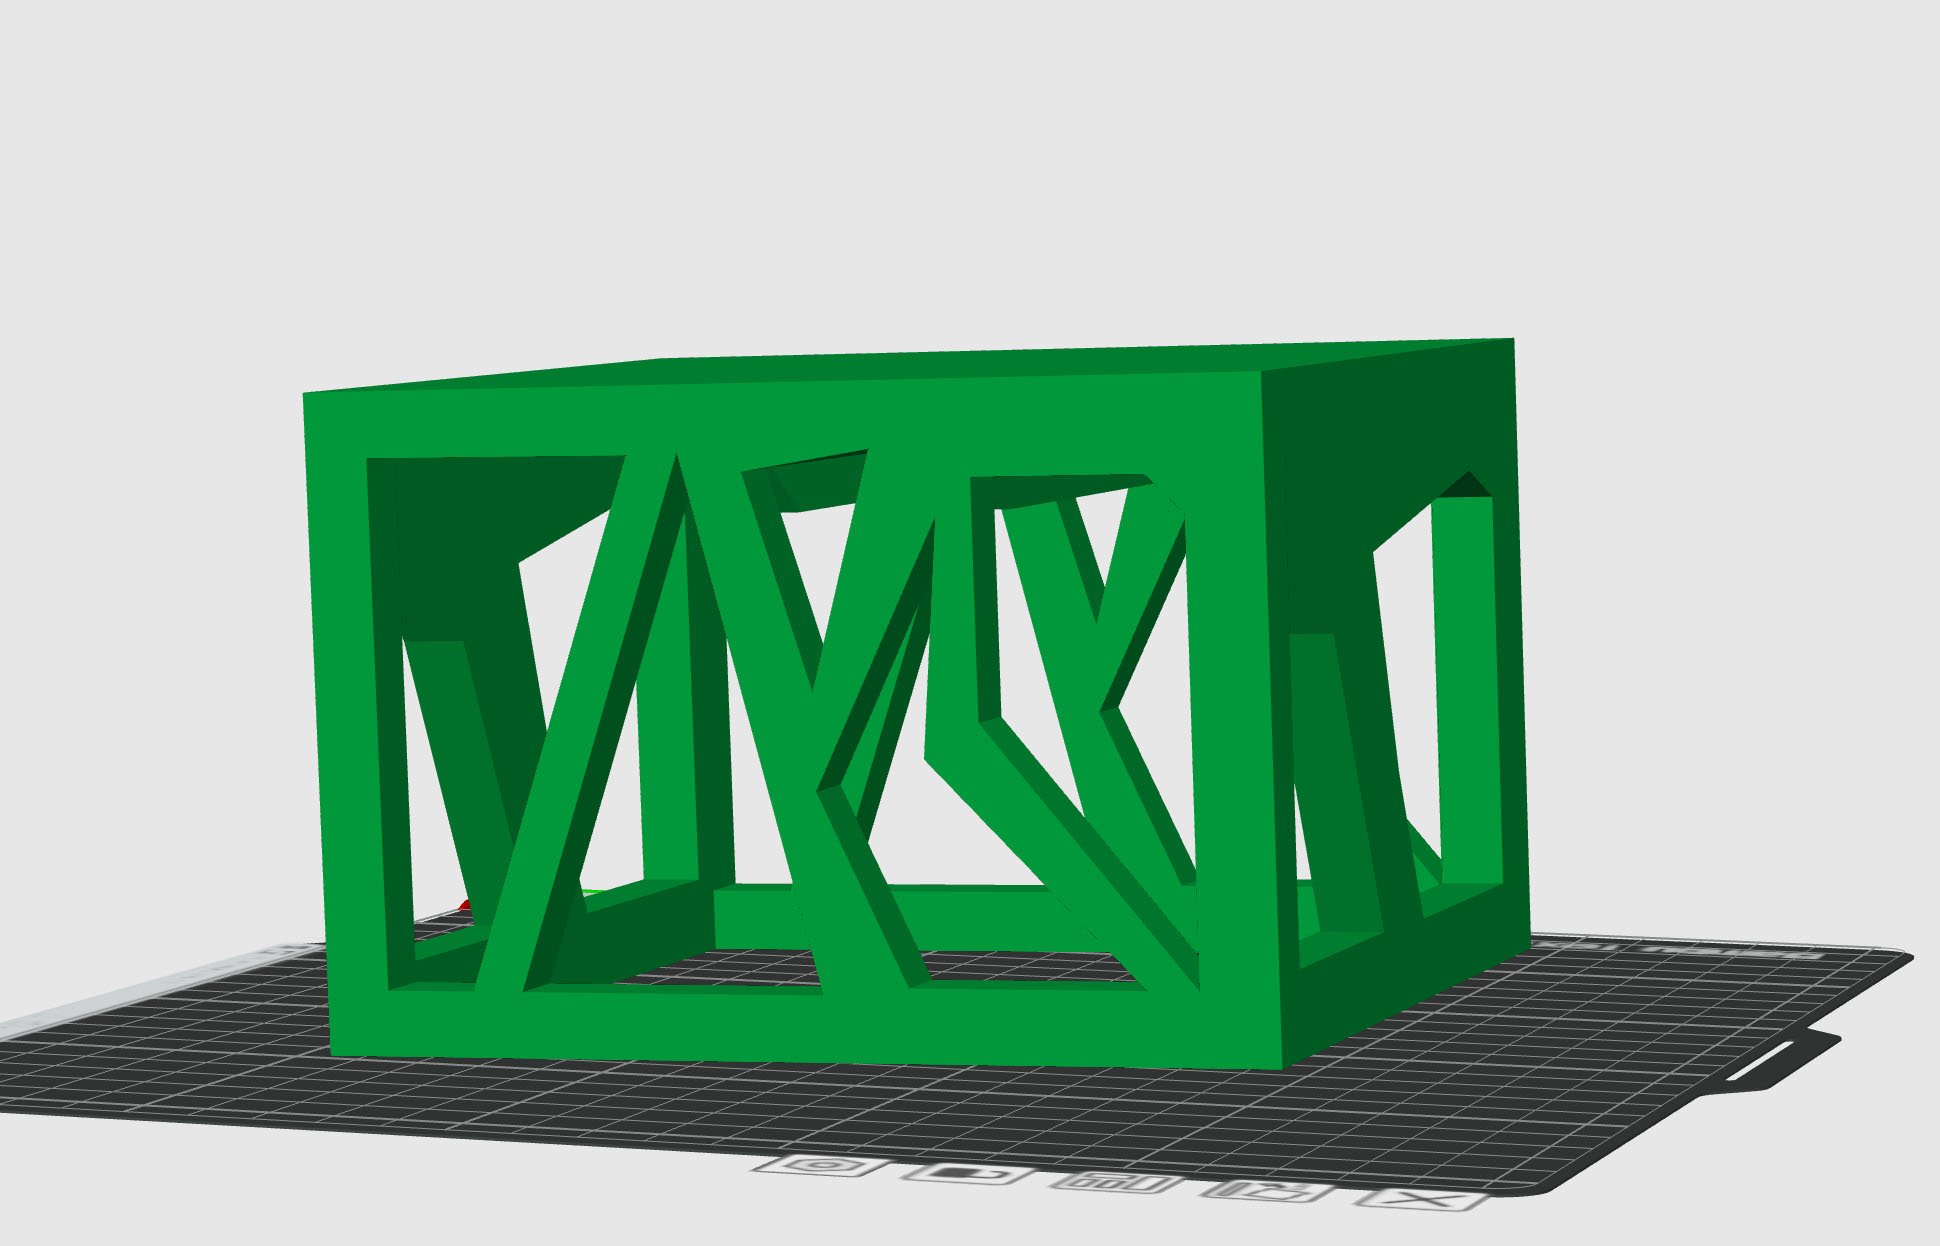
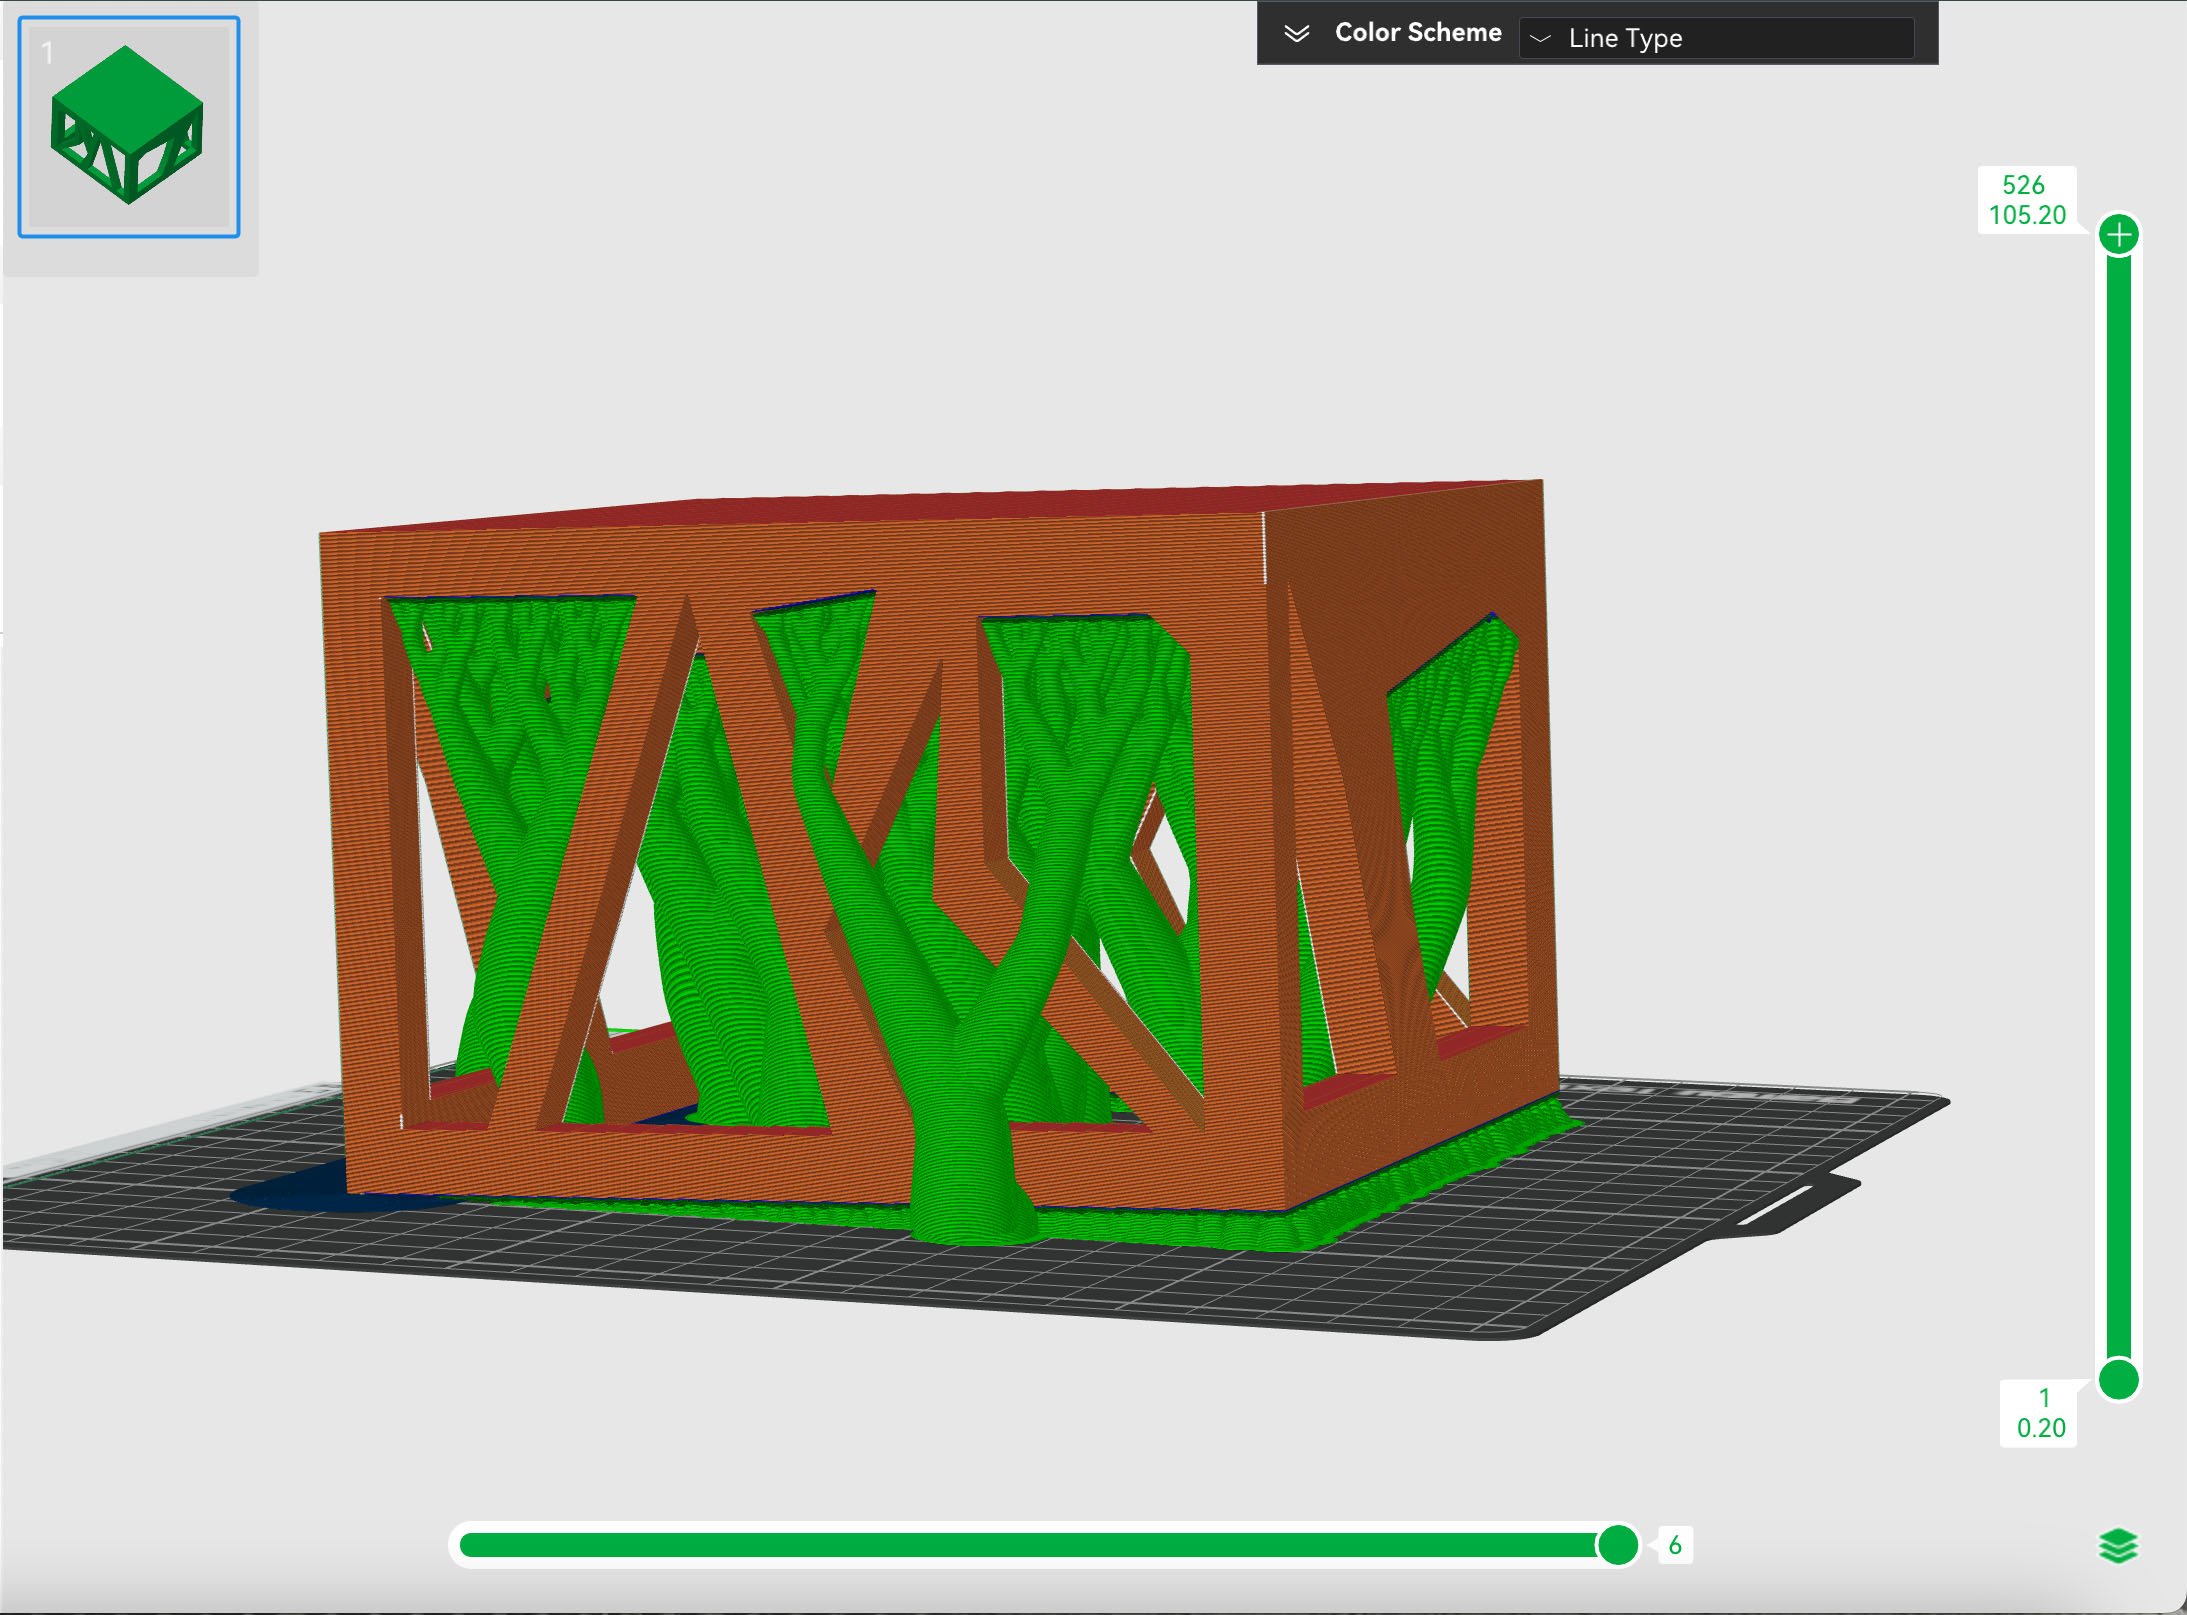
When considering 3D printing you model, always check where supports will be needed. Supports that are built inside a shape such as the one below will not be removable due to the geometry.
Consider removing the base of your model so that supports can be removed from the bottom. Alternatively, consider laser cutting models that are hollow with simple geometry. It will be much faster!
As a general rule, no parts of your model should be thinner than 1.5mm. Columns or extrusions are particularly tricky to print and so if you are planning on printing these features they need to be at least 2mm in diameter.
Because of the way these columns or extrusions get printed not only do the need to be at least 2mm in diameter, they shouldn't be too tall. Any taller than 50mm and they might start to distort and get very messy.
In the image below, you can see the errors caused by printing objects that are too small. Parts that are too small can break off and get stuck to other components, ruin your print, wasting your time and money.

Here are some of our favourite 3D Printing resources


